Ratio is a term you’ll definitely come across when you’re looking to print your favorite photo. What is it, why do you have to choose it, and which one to choose? Don’t panic, Xpozer’s got you. Read all about photo ratio here and become a ratio pro today.
What is ratio?
Let’s start by explaining the meaning of the word ratio. Ratio is short for ‘aspect ratio’. The aspect ratio is the proportion between the width and height of a photo. It’s commonly written as two numbers separated by a colon (:). The most common ratios are:
Square
1:1 (height and width are the same)
Rectangles
2:3*, 3:4* and 4:5
Panoramas
1:2, 1:3, 1:4, 1:5 and 9:16.
*These are the standard camera and smartphone camera ratios.
Depending on the orientation of your photo (landscape or portrait), the first and second numbers can be swapped. So, a 2:3 is the same as a 3:2, just a different orientation.
The ratio you use changes your photo’s composition. Some ratios work better with specific composition styles. I’ll explain more about composition styles later. First, let’s see how you can find out what the ratio of your photo is.
What ratio is your photo?
Check out the dimensions of your photo to find out what the ratio is.
Mac users:
Look up your photo in the Finder, press the control button + click the mouse button (or trackpad) simultaneously. Click ‘Get Info’. Find the dimensions in the ‘More info’ section.
Windows users:
Right-click the image file, click ‘Properties’ and check out the ‘Summary’ tab.
Once you have the dimensions of the file, you can calculate the ratio like this:
To calculate the ratio of your photo start by dividing its width (in pixels) by its height (in pixels). If the total is not a whole number (also called an integer), multiply it by another number until it is. These two numbers (the number you used to multiply it and the final total) are the ratio of the photo. That sounds super complicated, but bear with me and take a look at these examples:

Example 1:
Your photo is 4966 by 3312 pixels
Divide 4966 by 3312 = 1.5
Multiply 1.5 by 2 (first possible number to multiply with that gives an integer as the outcome)
1.5 x 2 = 3
Your photo’s ratio is 3:2

Example 2:
Your photo is 4416 x 3312 px
4416 divided by 3312 = 1.3
Multiply 1.3 by 3 to get (close to) a whole number
1.3 x 3 = approx. 4
Your photo’s ratio is 4:3
Which Xpozer ratio do you choose for which type of photo?
Certain cameras shoot in certain ratios. The most common ratios are 3:2 and 4:3. Full-frame and APS-C format cameras usually shoot in 2:3. Then there are ‘micro four-thirds’ cameras that shoot in 4:3. Most smartphones shoot in 4:3 as well. But there are more ratios to choose from, either in your (phone) camera or later on while editing your photo.
I would recommend to always shoot to your camera sensor’s full potential, though, and choose the standard 2:3 (or 3:4 in micro four-thirds). If you shoot in 16:9, what happens is that your photo is instantly cropped by your camera, and you are actually missing the top and bottom parts of the photo. Shooting in the full 2:3 or 3:4 gives you the opportunity to play with the composition later, when you are editing your photo.
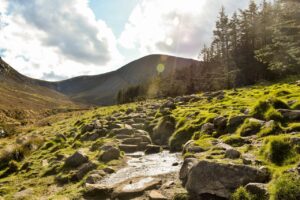
2:3 ratio
2:3 is great for all kinds of photography. It’s slightly wider than a 4:3, so you can often give your subject some more ‘breathing room’. Shooting with the ‘rule of thirds’ is quite easy when using this ratio. The rule of thirds is a composition style in which you ‘divide’ a photo into 3 equal pieces and put your subject(s) on one of the 2 divider lines between the 3 pieces. In the example below, you can see this ‘rule’ executed perfectly, with the moon at 1/3 of the photo and the top of the mountains at 2/3 of the photo.
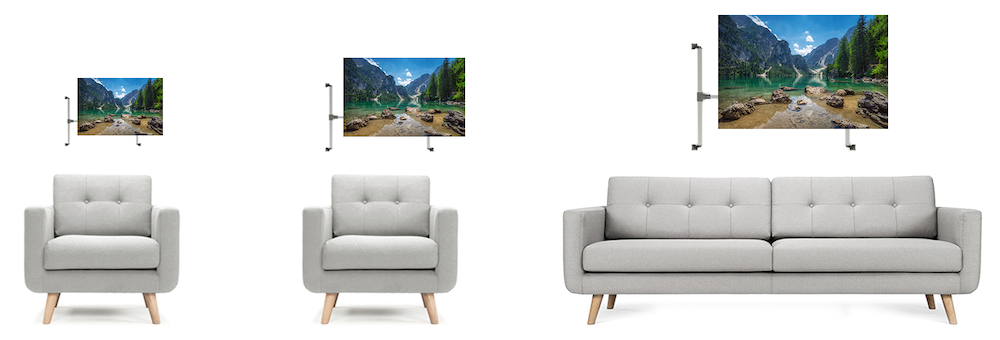
Rectangular photos are great for any type of space. Make sure to choose a size that fits the room and makes sense with the furniture surrounding it. A small chair with a huge Xpozer above it might not make sense. A huge sofa with a tiny Xpozer above it looks weird too.
4:3 ratio
4:3 is commonly used in smartphones and the mirrorless ‘micro four-thirds’ cameras. This ratio can be used in all types of photography.
4:3 ratio example image
This is the same photo as the one above, but now I cut off the top part of the photo, to get a 4:3 ratio. As you can see, it gives the photo a tiny bit less ‘breathing room’.
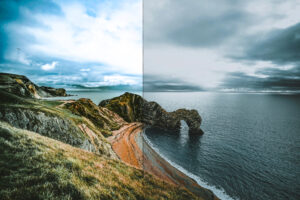
16:9 ratio
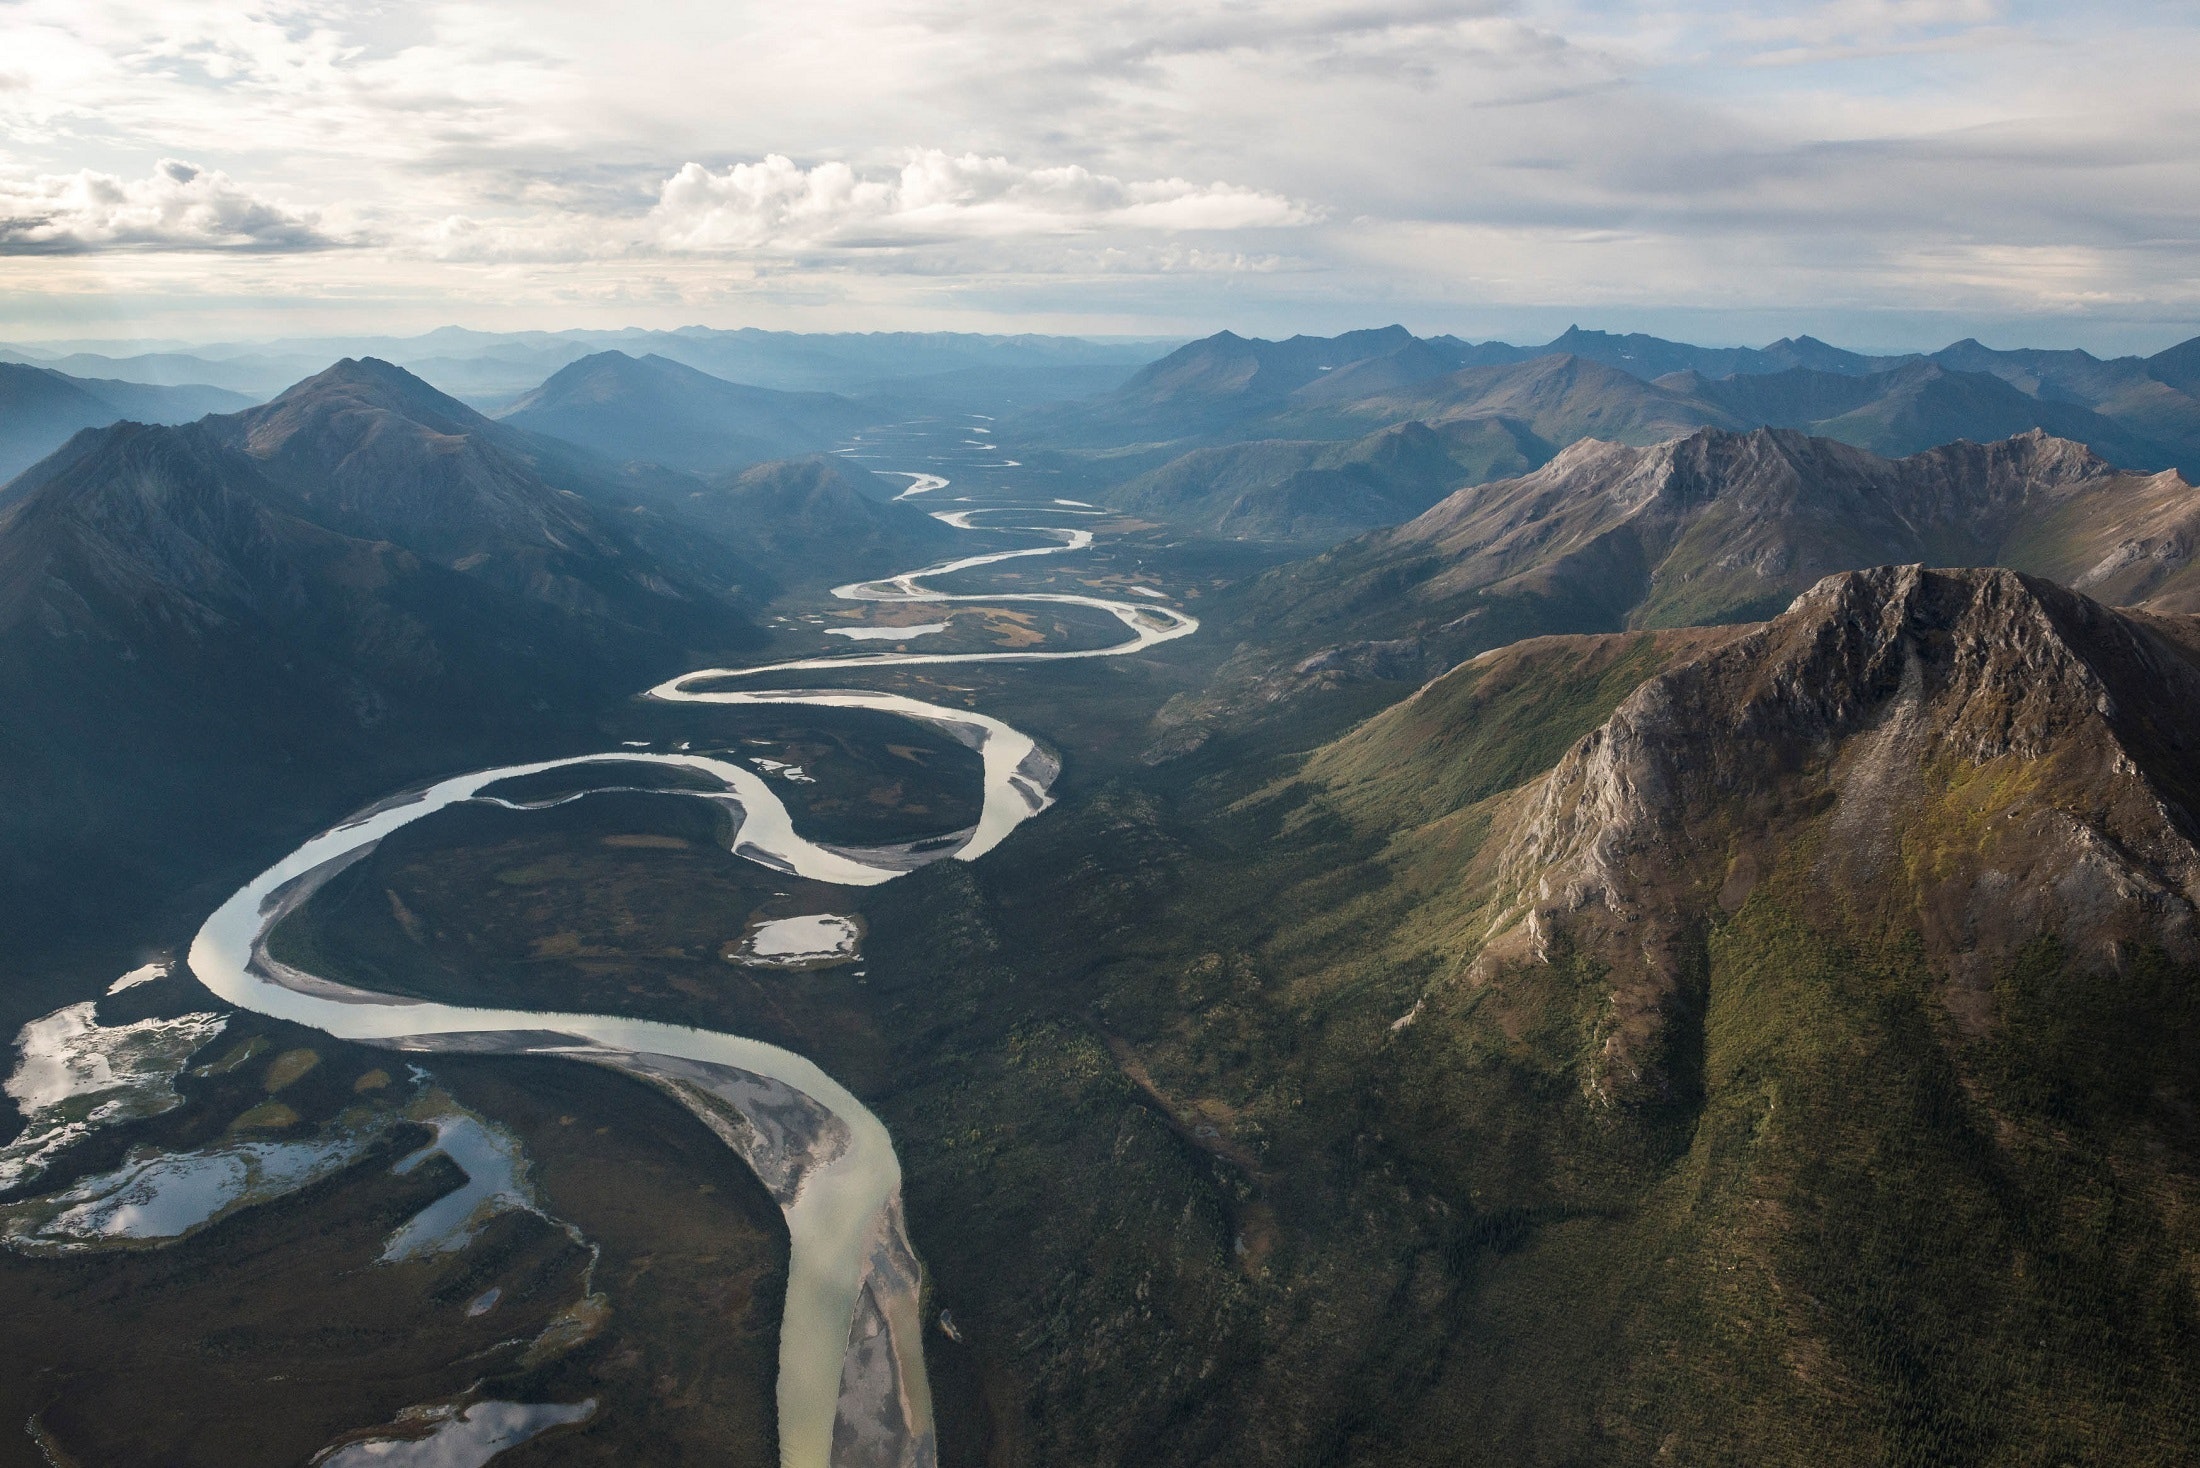
16:9 is commonly used for panorama photos and smartphone videos. It’s great for landscape photography, because you can capture so much of a landscape at once.
16:9 ratio example image
This is the same photo as the one above, but now I cut off the side parts of the photo, to get a 16:9 ratio. As you can see, the photo still sort of makes sense. It would not be my first choice, though. There’s enough sky in the image, but in my opinion, it could use more water in the bottom part. It feels like it’s not entirely in balance somehow.
Horizontal panorama photos are great for above the sofa, or above your desk. The panoramic shape creates the illusion that your wall is wider.
Vertical panorama photos make your ceiling look higher. Make sure to keep enough room on all sides of it, to give the photo the ‘breathing room’ it deserves.
1:1 ratio
1:1 isn’t as widely used in ‘standard’ photography as the previous ratios. A 1:1 ratio is very versatile. It’s perfect for social media profile pics. Most photos can be cropped into 1:1 photos and still look great.
1:1 ratio example image
This is the same photo as the one above, but now I cut off the top and bottom parts of the photo, to get a 1:1 ratio. The photo still makes sense, it feels in balance, even though I cut off large chunks of it.
A square photo is also versatile in the sense that you can hang it anywhere. Again, make sure to get an Xpozer size that makes sense in its surrounding area.
How to use ratio for the perfect composition?
Use Photoshop or Luminar or any other photo editing software to crop your photo in the desired ratio. For both Photoshop and Luminar: press the C key on your keyboard to start cropping. Try out a few options and see what happens to your photo and the composition.
Composition guidelines
If you need help to create a well-balanced photo for the Xpozer ratio of your choice, use one of the composition guidelines mentioned below. Note that all compositions can be made with any of the ratios, but some combinations work better than others. Also, to a certain degree, the beauty of a photo is a matter of taste.
Rule of thirds
Put your subject or focal point on 1/3 or 2/3 of the photo, either horizontally and/or vertically, in order to create an interesting composition. Putting your subject on a point where two lines meet works very well in most cases.
This composition style works best for rectangular and panorama photos.
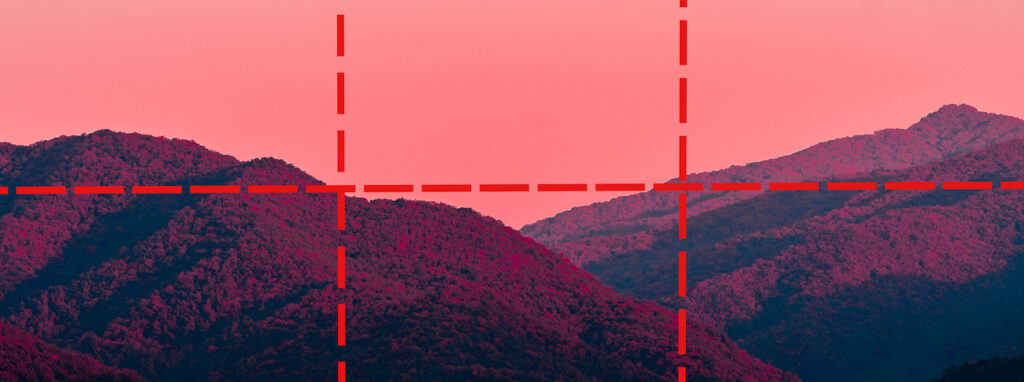
Golden ratio
The golden ratio works just like the Rule of thirds, but two of the lines to separate the photo are closer together. This makes the middle section of the photo a lot smaller.
The grid has a 1:0.618:1 ratio, instead of the 1:1:1 ratio in the rule of thirds.
This composition style works best for rectangular and panorama photos.
The guy in the photo is positioned exactly at a point where two of the gridlines meet. That makes for a well-balanced composition.

Symmetry
In a symmetrical photo composition, the photo can be mirrored horizontally and/or vertically and have the same ‘weight’ on either side.
Symmetry works in all photo shapes and sizes.

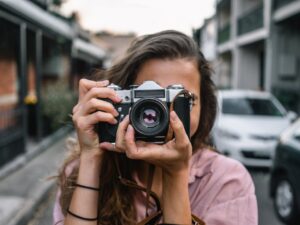
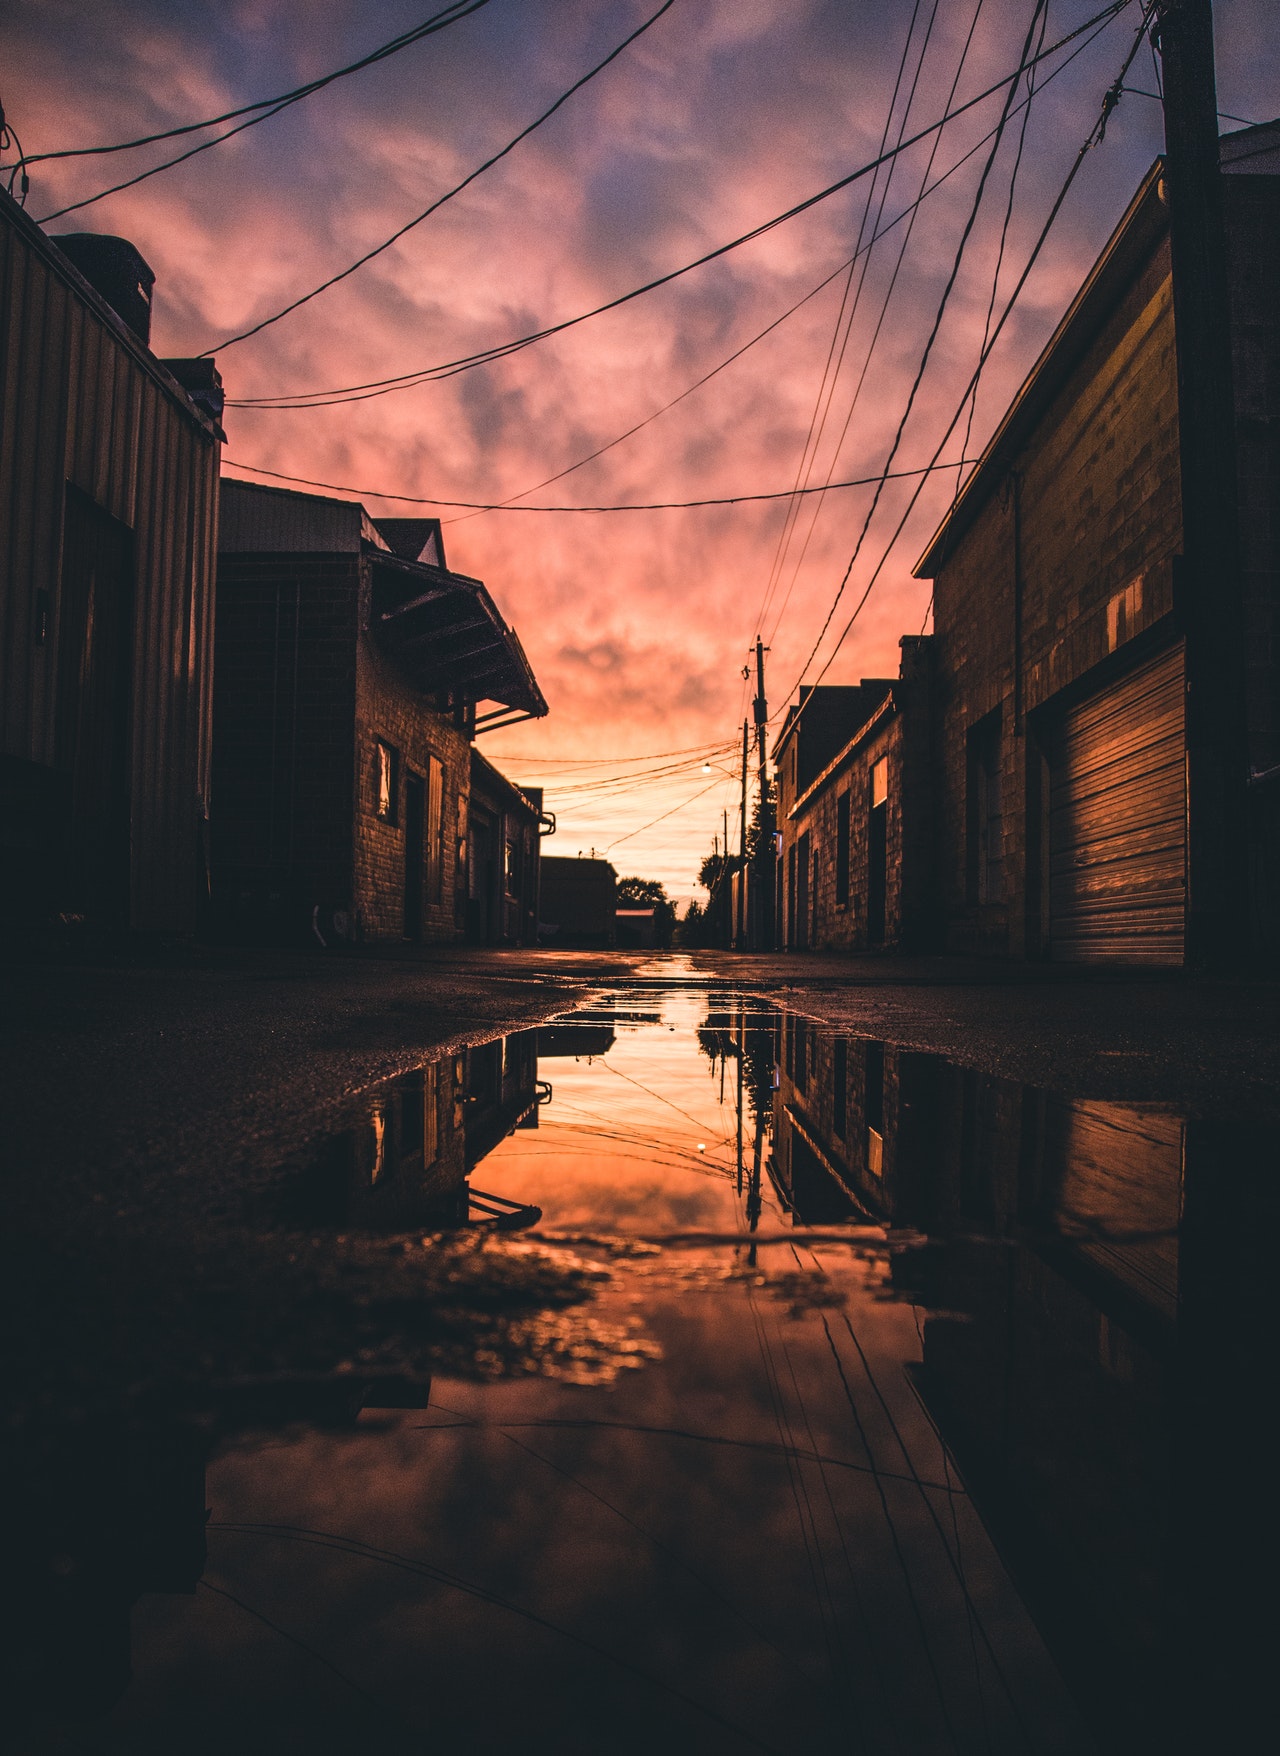
Leading lines
Leading lines help your viewer experience your photo. A leading line guides your viewer’s eyes towards the subject. In the example photo, the lines in the pavement lead your eyes towards the Eiffel Tower.
Leading lines work great for any photo shape or size.

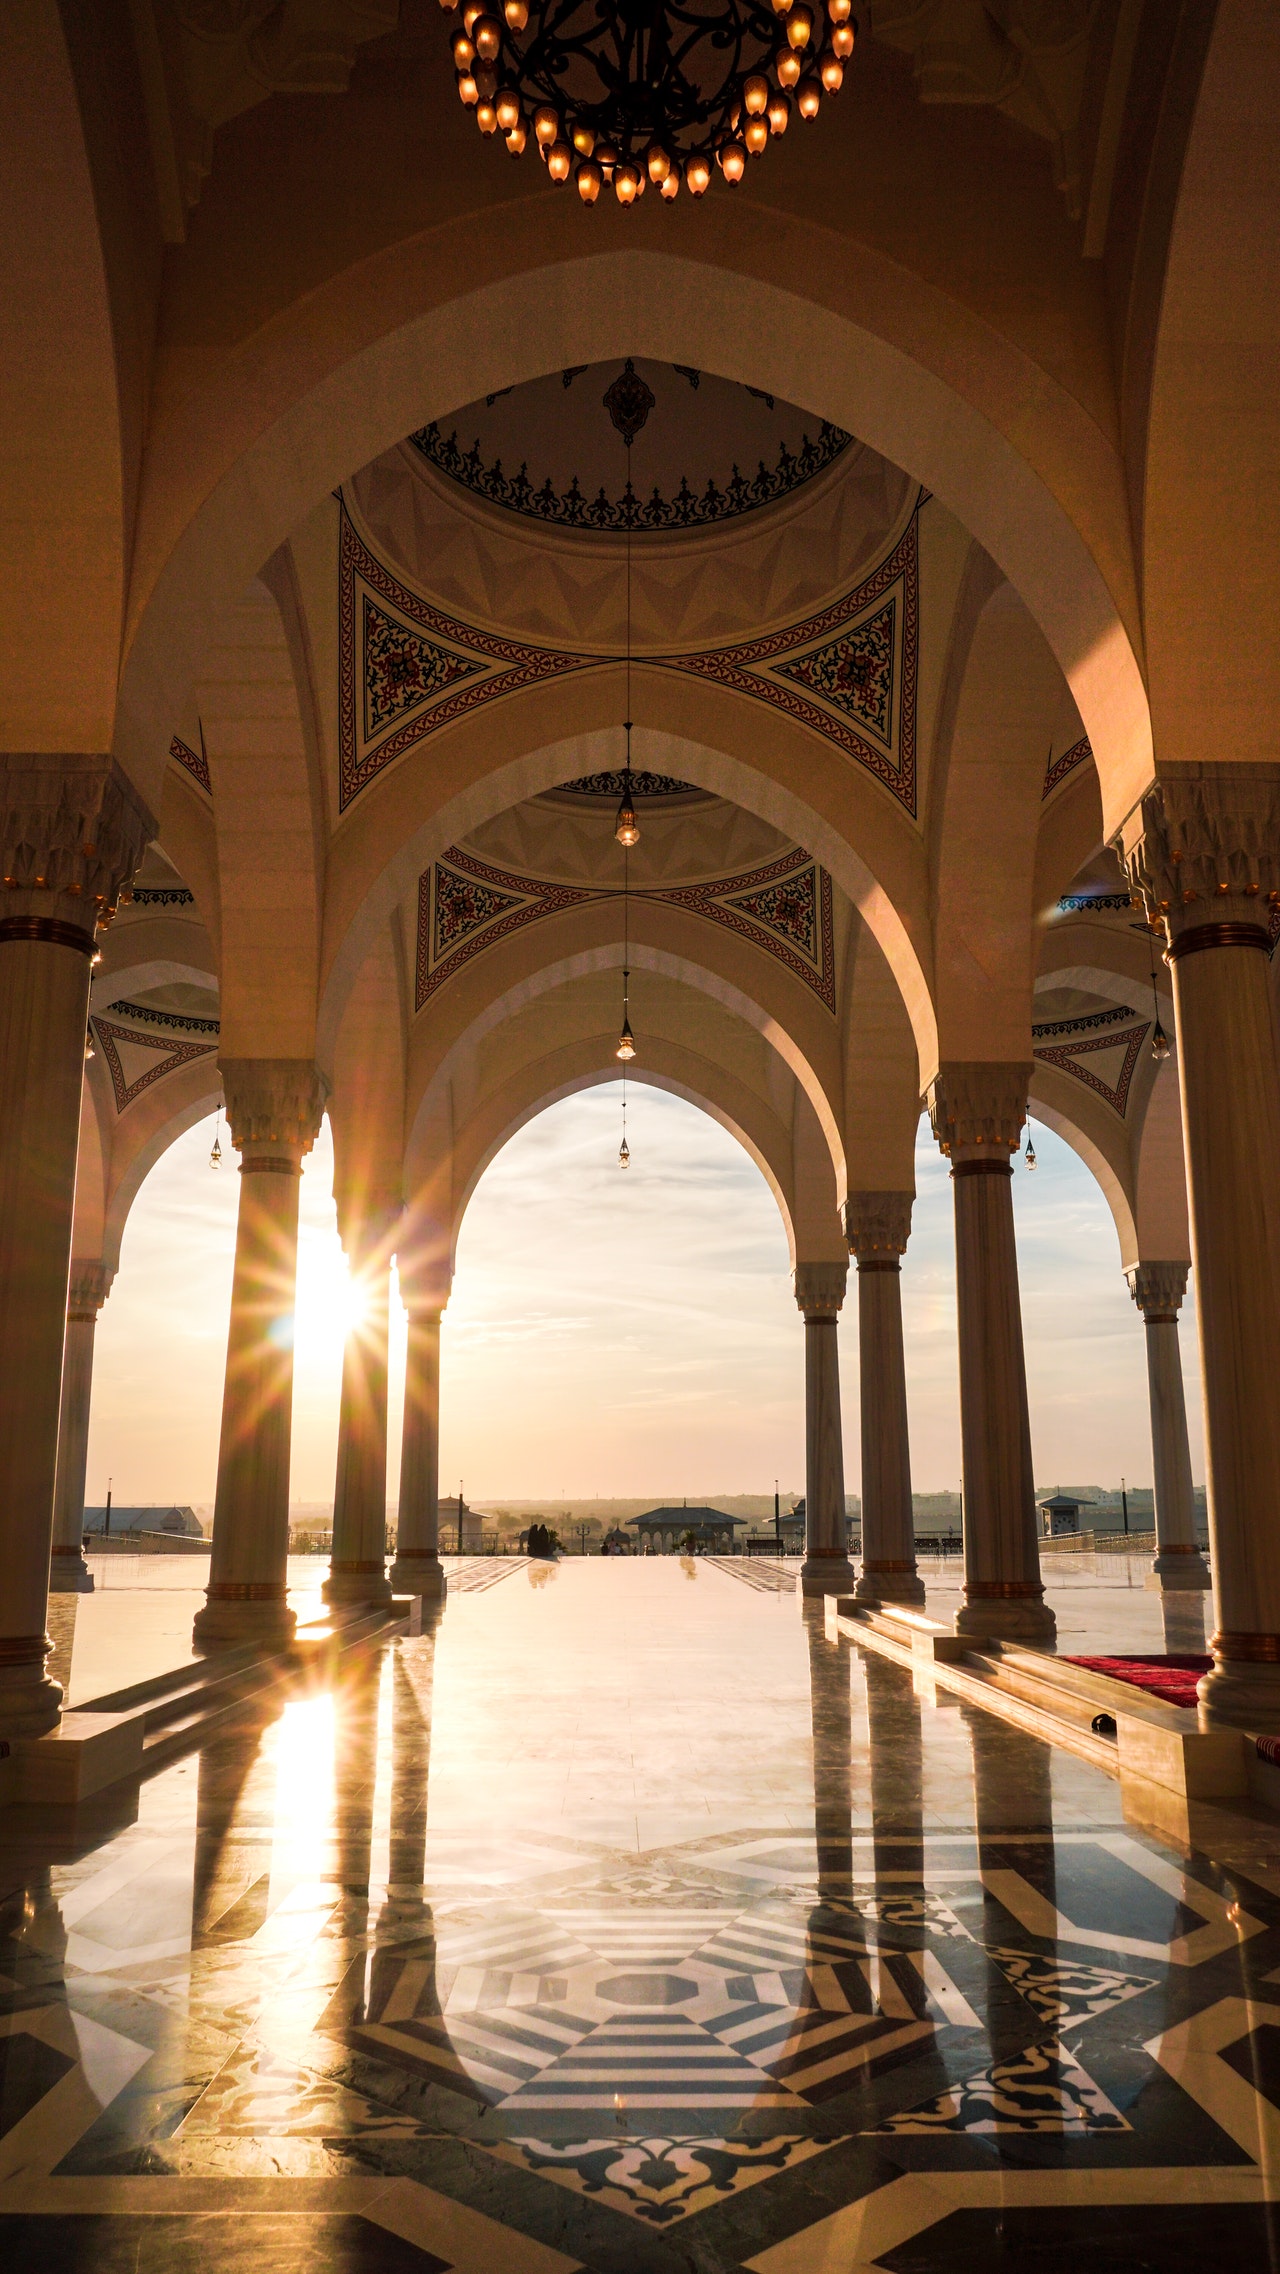
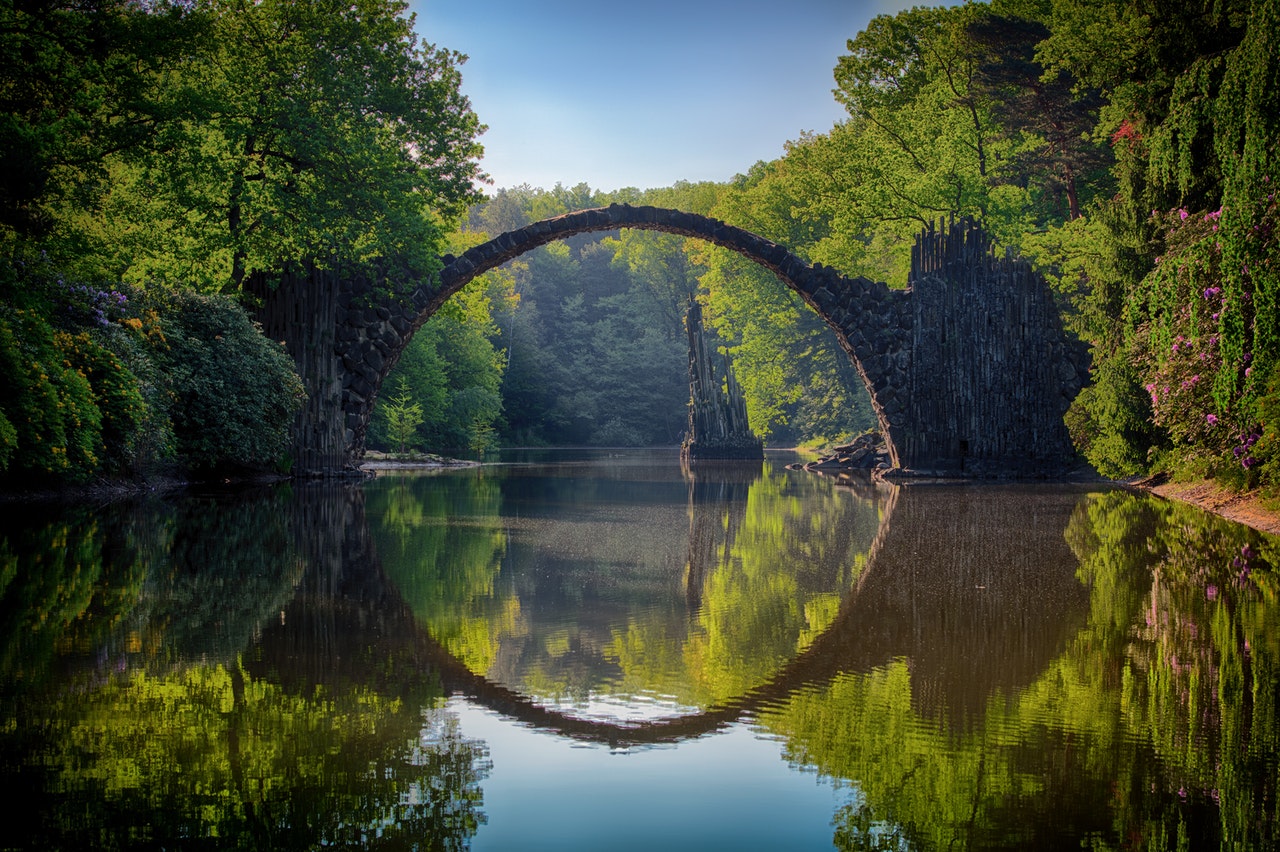
Framing
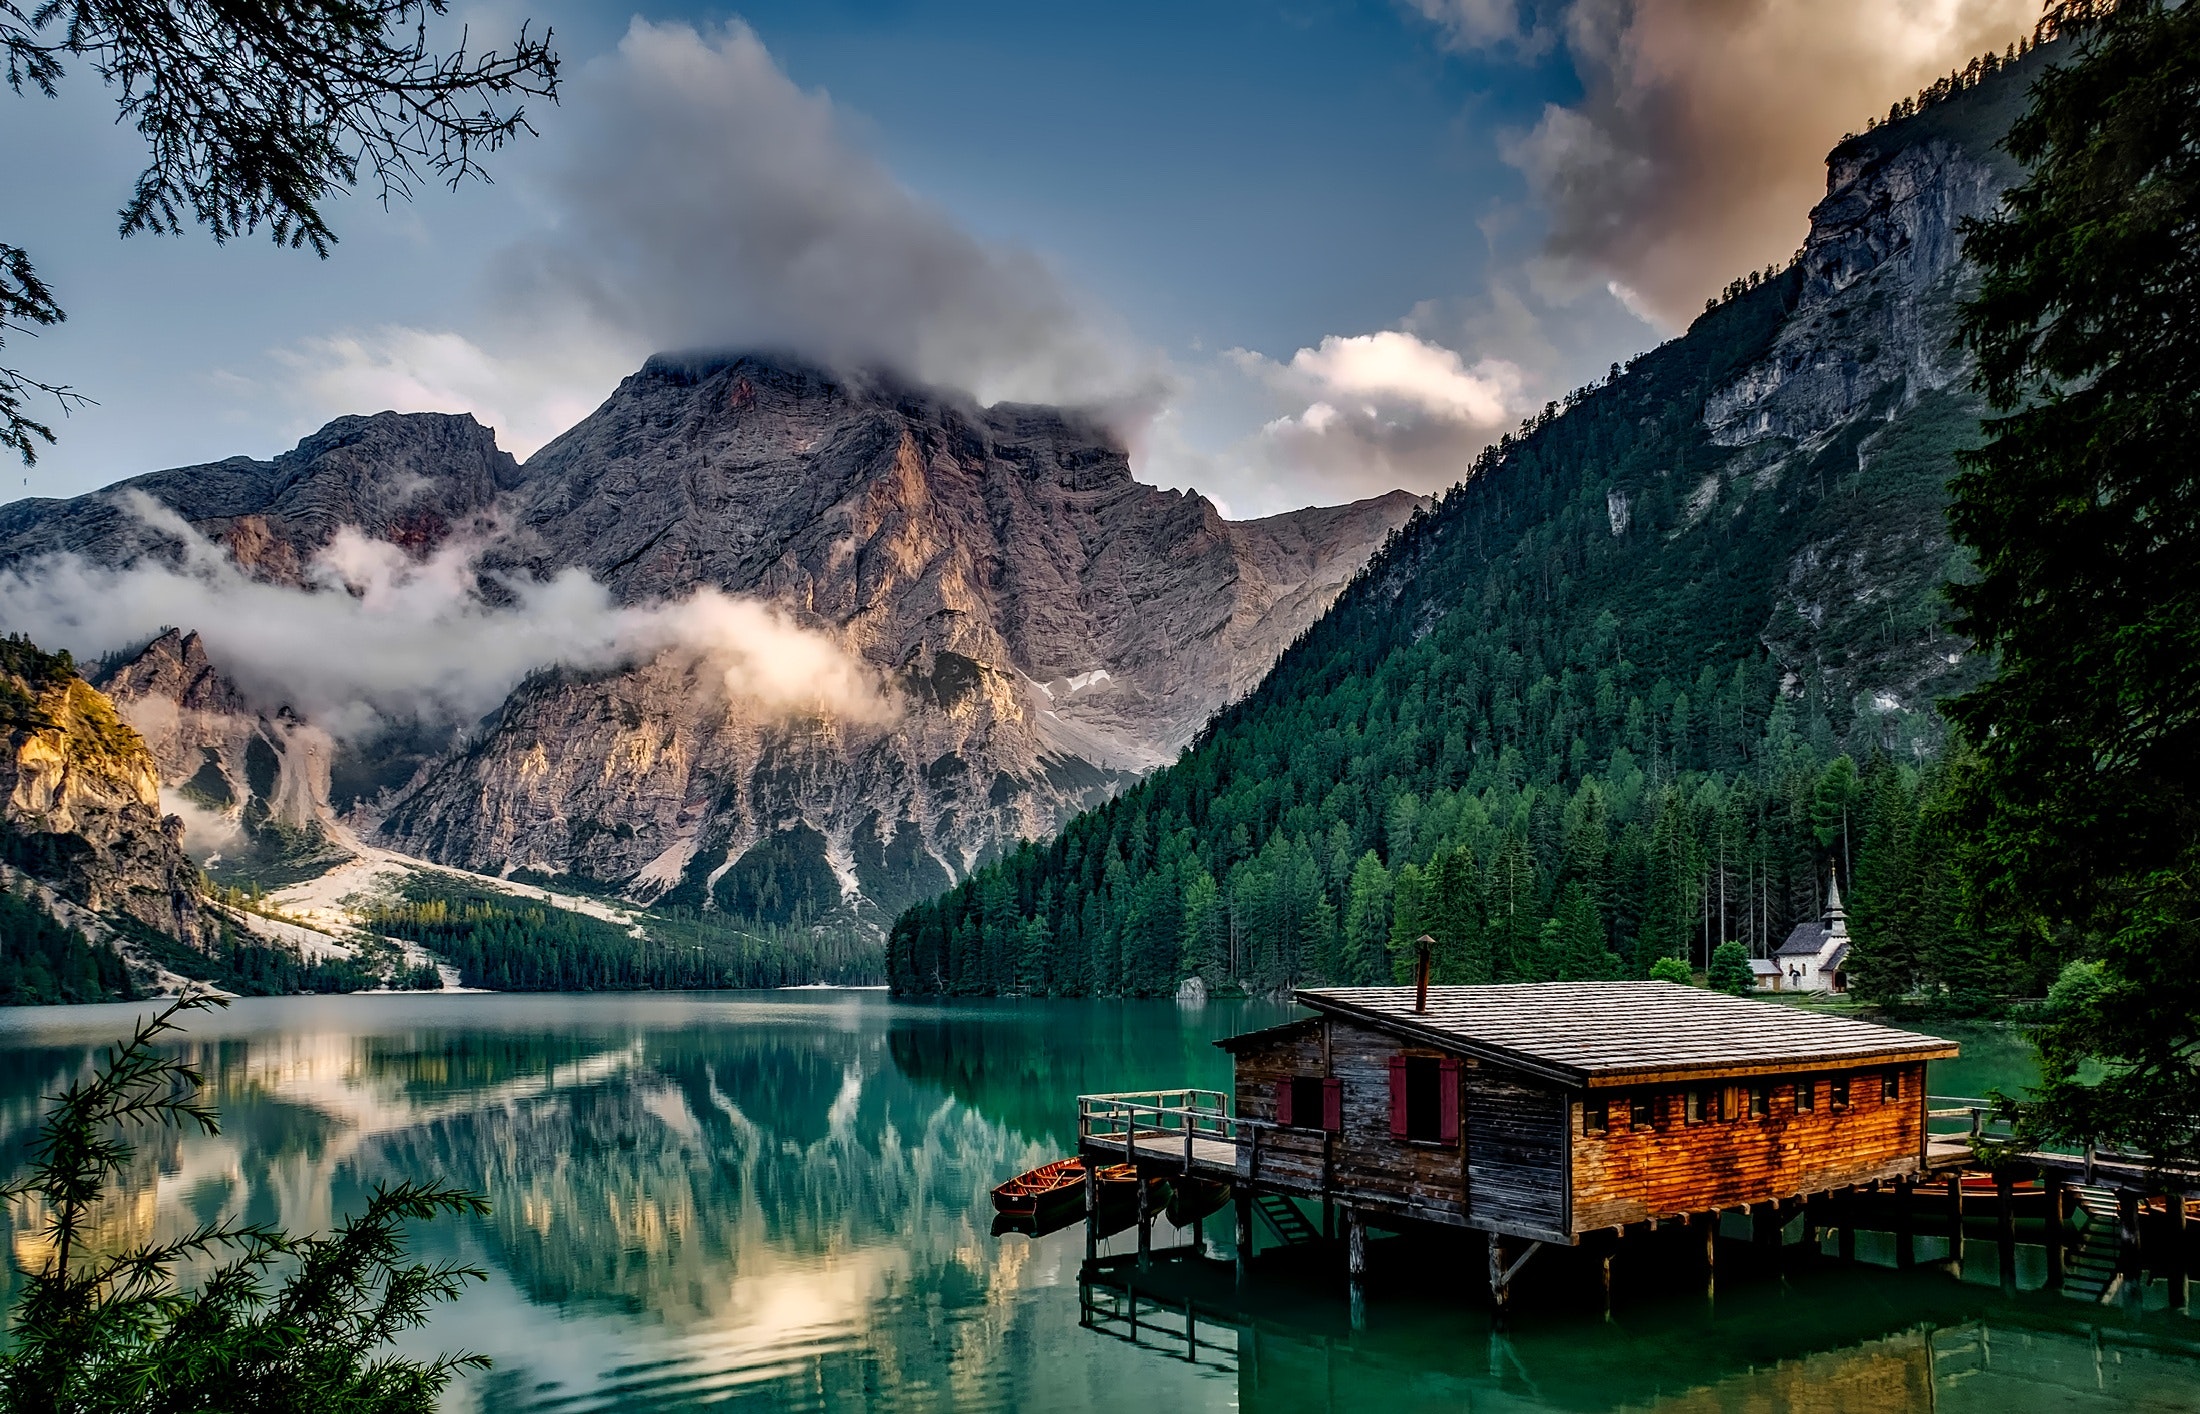
The subject of your photo can be magnificent, it doesn’t necessarily mean that your photo is, too. Sometimes your photo lacks a certain depth. Use a tree branch, arch or other ‘framing’ elements in your photo to add something interesting, in order to compliment the subject.
Framing works for all photo shapes and sizes.

Asymmetrical balance
The example photo is not quite symmetrical, but it does feel balanced out. The rock in the bottom feels just as ‘heavy’ or important to the composition as the rock on the left, with the guy sitting on it. The left one is brighter, the right one dark. A very dark part of a photo can sometimes demands too much attention, but in this case, it balances the photo out perfectly.
It’s possible to create an asymmetrical balance in photos of all shapes and sizes, though it might come across stronger in a rectangular or panorama photo.

Rule of odds
The rule of odds states that in a scene where there are multiple subjects, choose an odd number to frame in your photo. The example photo shows 3 bottles’ reflections. If there would have been 2 bottles’ reflections, the viewer’s eyes would have been lead from one to the other endlessly, trying to decide on which bottle is the main subject. The fact that there are 3 reflections, makes the photo calmer and more satisfying to look at.
This ‘rule’ can be applied to all sorts of photo shapes and sizes.
Of course, rules are meant to be broken. These examples are merely guides to keep to if in doubt. If you choose to deviate from these guidelines, do so consciously and for good reason. That’s what is going to make your photo brilliant.
Practice photos
If you learn something new, you usually need to practice to really know your stuff. Practice your knowledge of compositions and ratios with the photos below. Note that sometimes, a mixture of composition ‘rules’ are combined to get the strongest compositions. Ask yourself the following questions to learn to think more critically about ratios and compositions.
- Which composition styles can you discover in these photos?
- If these were your own photos, would you have used the same ratios?
- Would you have cropped more or less, or chosen a different focal point?

More articles you might like: