How can you make your grey-ish photos look sunnier? Sometimes, you’re at the perfect place, at the wrong time. And, especially when you’re traveling, you don’t always have the luxury to come back at a later time. So, you take your perfect shot, and see what you can do in post. Whichever editing software you use, we can give you some general tips about what to look for when editing your photos into sunnier-looking versions of themselves.
I’m working with this photo, taken by JJ Perks. It is a good photo, but I can imagine a few instances where you’d need a sunnier atmosphere. So, let’s see what we can do with it!

Sunnier hues
The first step I’ll take is changing the hues in the photo. On a sunny day, we wouldn’t see the greenish grey tones we can see right here. So, I open Adobe Lightroom and start playing with some sliders.
I begin with changing the ‘tint’ slider. We need to get rid of the greenish tones. As I add more purple, the colors of the scenery become a bit more natural. Don’t overdo it.
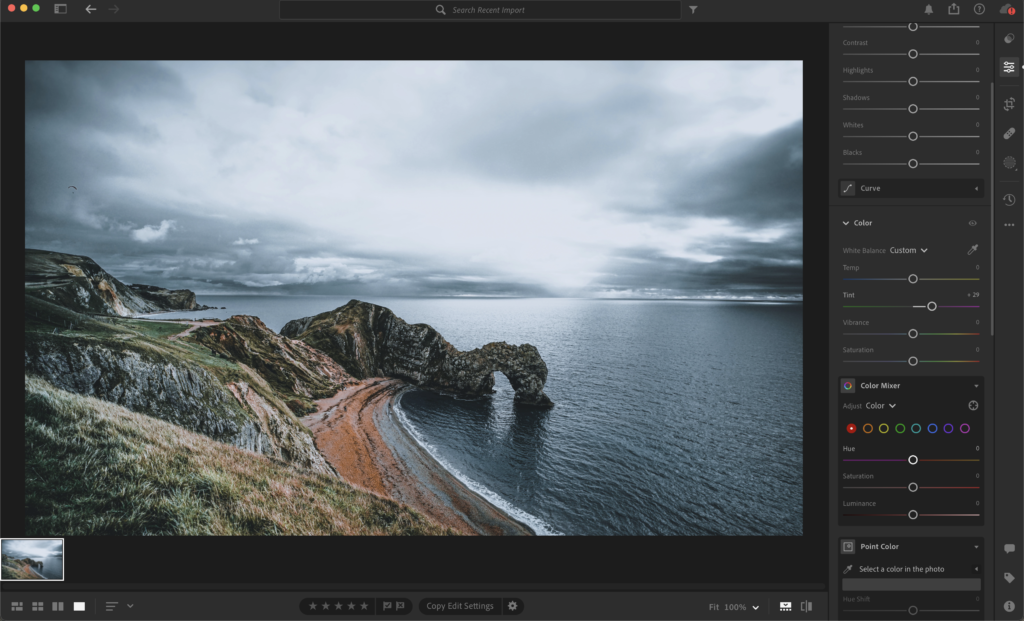
Then, I want to make the green and orange colors stronger, as they would be if the sun was shining. I use the ‘vibrance’ slider. I also slide the ‘temp’ slider a little to the right, to make the scene look a bit warmer.

So, the colors in the photo make it look a bit warmer already. What I’ll do next is to create a mask (the dotty circle button on the far right of the screen. I select the sky and make the sky lighter and bluer. Then I check out the photo as a whole again and make adjustments to the foreground to match my new sky.
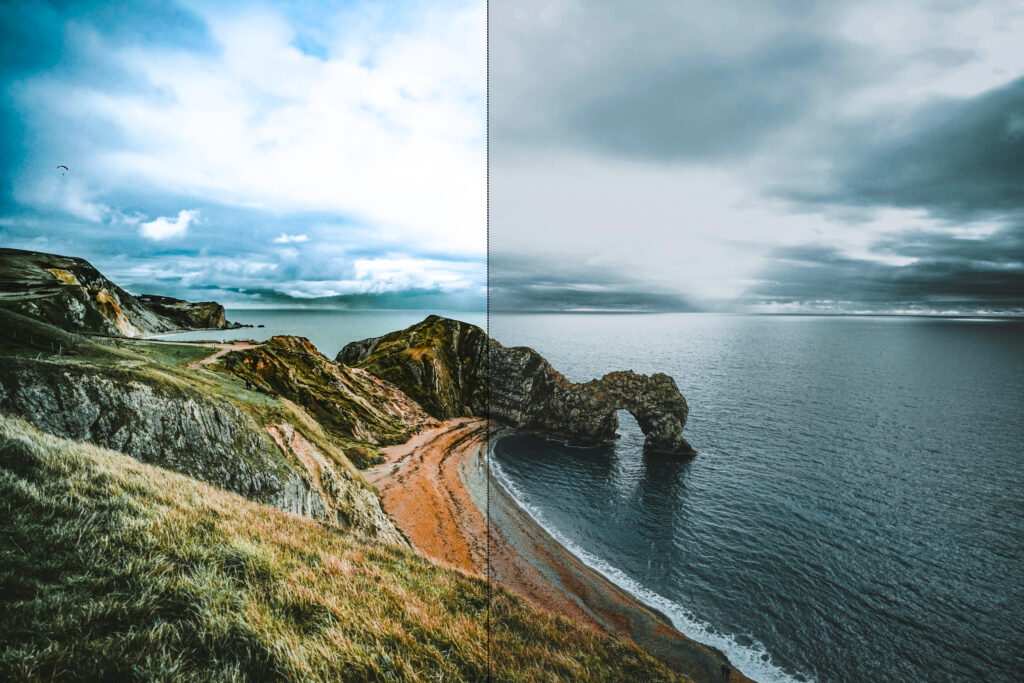
From dark and cold to bright and sunny
Replace the sky to a sunnier one!
Don’t like the sky at all? Replace it!
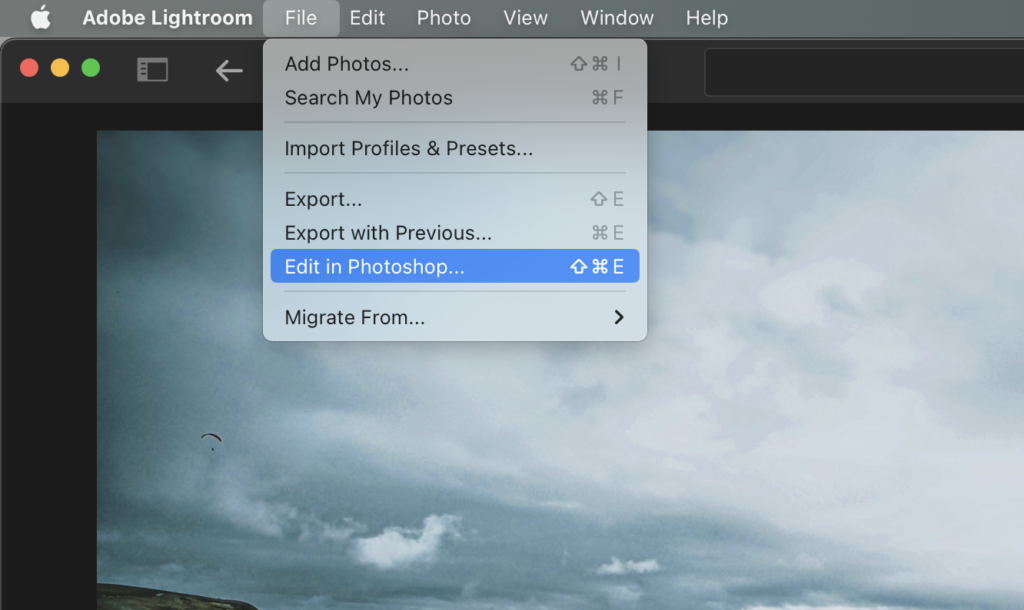
Open your photo in Adobe Photoshop (or any other software that lets you replace the sky. You don’t even have to open the photo in Photoshop yourself, just click ‘file’ in the main menu, and choose ‘Open in Photoshop’.
In Photoshop, play around with the Sky Replacement option. To be fair: it’s not perfect. I’ve struggled to replace the sky with this particular photo, and as the green-ish hues make the horizon harder to spot for the AI-tool, it’s a huge mess.
For some photos, though, it is super easy!
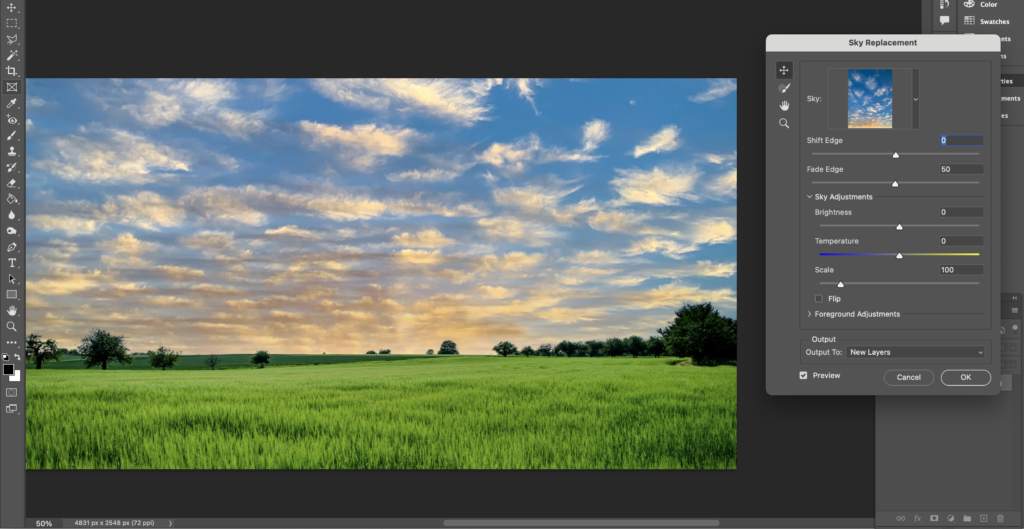
This photo taken by Ákos Szabó, has a sharp line at the horizon, which makes it easy for AI to pick it up. Is the sky in the original a bit boring to you? Well, then we can change it!

In Photoshop, click Edit > Sky Replacement. Choose a sky that you like and check out the results.
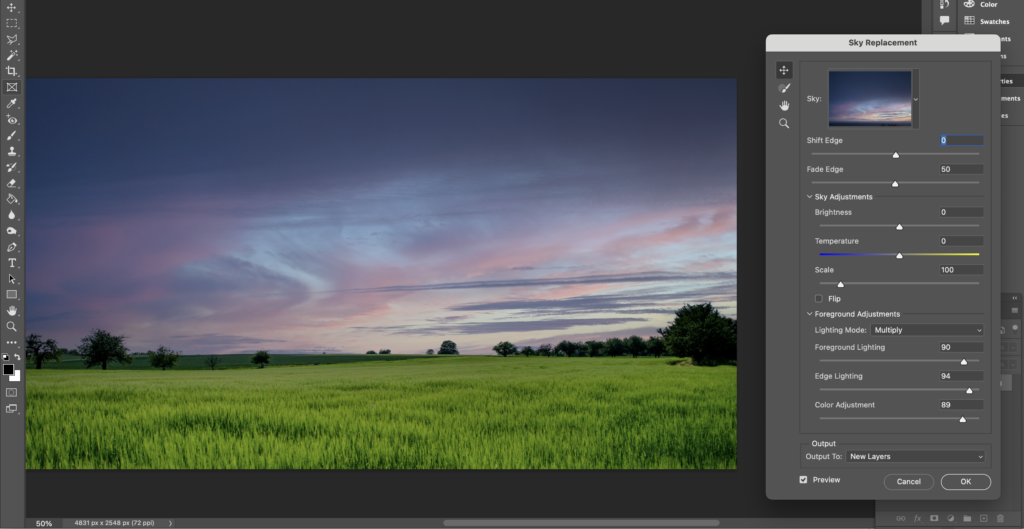
Don’t forget the foreground
Don’t forget to click the ‘Foreground Adjustments’ menu and adjust the foreground accordingly. A darker sky looks unnatural with a bright and sunny foreground.
So, as you can see, a lot is possible for a beginner at Photoshop and Lightroom. Play with these basics and expand your knowledge of the software as you go.
Thanks for letting me take you on my journey towards sunnier photos! Learning Photoshop, Lightroom or any other software is mostly done by just trying a few buttons and sliders and see where it takes you. For the more specialised tasks, use blogs and videos to get you there.