The basics of photography are knowing all about focus, and about how to use light (tips about the exposure triangle here). If you know the ‘rules’ by heart, you’ll be a better photographer for it. Here’s a guide to get you started.
The power of focus
The focal point in your photo can mean the difference between a blurry mess and a photographic masterpiece. It is one of the most important factors of the success of your composition. So, how do you make sure to get it right? Luckily, that is something you can learn! The focal point in your photo is what draws the viewer’s eyes first. You could say that the area that is in focus, is the subject of your photo.
Manual or auto?
Modern day cameras are equipped with some great options to help you get your focal area exactly right. You can always choose to focus manually (M). In some cases, it is the best option. Even the more high end modern day cameras have their limits in auto focus (AF). Examples of when it’s best to use manual focus: shooting night skies, close-ups, heavy foregrounds or multiple subjects.
In most cases, though, auto focus would be your best bet. There are multiple types of AF you can choose from. What are AF-C, AF-S and DMF and what the differences between them?
AF-C
AF Continuous. Choose your focal point, keep your shutter button halfway down and the focal subject will not change. So, that’s great if you’re shooting moving objects, animals or people.
AF-S
AF Single. Choose your focal point, lock it and then change the frame if you want. Great for non-moving objects.
DMF / Full Time Manual Focus / AF+MF (depending on camera brand)
Direct Manual Focus. Choose the focal point, keep the shutter button halfway down, and adjust focus with the ring on the lens. This mode is available for Sony, Canon and Fuji. Other brands allow you to adjust focus with the ring in the AF modes.
Use Auto Exposure Lock (AEL) if you want to keep your focal point, but change your frame.
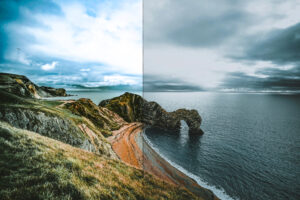
Depth of Field
Depth of field is the distance between the first and last parts of the photo that are sharp. So, how much depth do you want to show? Or should everything be in focus? It’s your choice! Play with your distance to the subject and the amount of zoom to influence the depth of field.
Where to focus?
The focal point is usually on the subject. Some general ‘rules’:
- If you’re capturing people or animals, make sure the eyes are in focus.
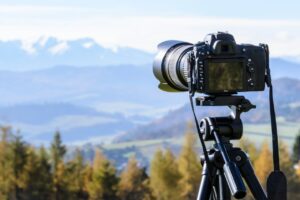
- If you’re shooting a landscape, make sure to have a bigger depth of field, so more is in focus.
- With portraits, make sure to have a smaller depth of field, so the background is nice and blurry.
- If you have multiple subjects, like in a family portrait, for example, make sure to have all in focus.
More tips on how to get the most out of your portraits, check out this blog:
How to practice focus?
Practicing can be done with any subject and under any conditions. Although, if you want to challenge yourself a bit, prepare a shoot with playing kids, driving cars, a concert or a sports match. Especially in darker situations, you will need to know all about the exposure triangle, too.
Good luck on your journey to becoming the best photographer (or just a very enthusiastic, good enough one ;-))!