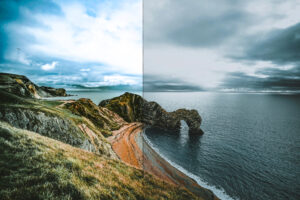
Creating an Xpozer Print from your smartphone photo? The newest models often have great cameras nowadays. Photos made with them are very likely of high enough quality to print on Xpozer. But don’t just upload your smartphone photos just yet. Take a look at our editing tips first to get the most stunning Prints. Don’t forget the bonus tips at the end.
Go to the editing steps for Snapseed ->
Go to the editing steps for Lightroom ->
Editing with Snapseed (free app) using your smartphone
Download the app Snapseed via the Playstore or Appstore, depending on the kind of smartphone you use. The app is free to use. Open the app and tap the plus sign to look up a photo on your smartphone. Tap the photo you want to edit and it will be opened in Snapseed. Another option is to look up a photo on your phone, press ‘share’ and ‘share’ it with Snapseed.
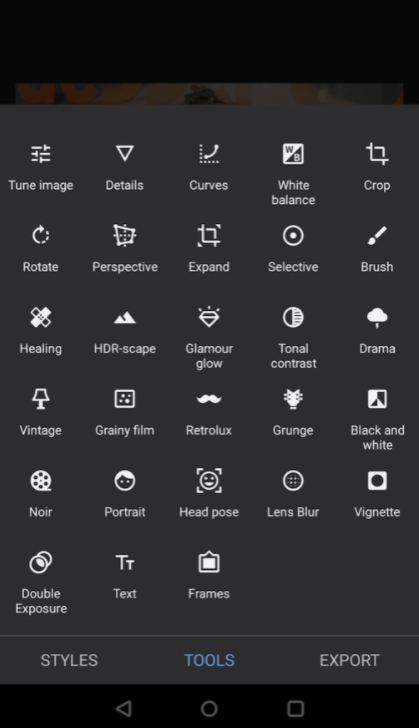
Tap TOOLS at the bottom of your screen. Take a look at the image, you’ll see a screenshot of the TOOLS menu. Here you can find all editing tools the app has to offer. I’ll write about a few basic tools in this article.
Step 1
In step 1 I’ll explain how to get your horizon straight and how you crop parts out of your photo.
Step 2
In step 2 I’ll explain how to use the Healing tool to get rid of annoying spots.
Step 3
In step 3 I’ll show you how to edit colors using the White Balance and Tonal Contrast tools. Also, I’ll tell you a bit about the Selective tool, which you use to edit only a part of your photo at once. This is very handy if you only need a part of your photo a bit darker, brighter or sharper, for example. More on the Selective tool in step 4.
Step 4
In step 4 I’ll explain how to make your photo look sharper.
Don’t forget the bonus tips all the way at the bottom of this article.
Step 1: Straightening and cropping
A landscape photo is best in 99.99% cases, when it’s horizon is straight. Keep your camera levelled when taking the photo. That way, less of your photo needs to be cropped out. Completely straight photos are difficult to take without a tripod, so just do your best if you don’t have all your gear with you.
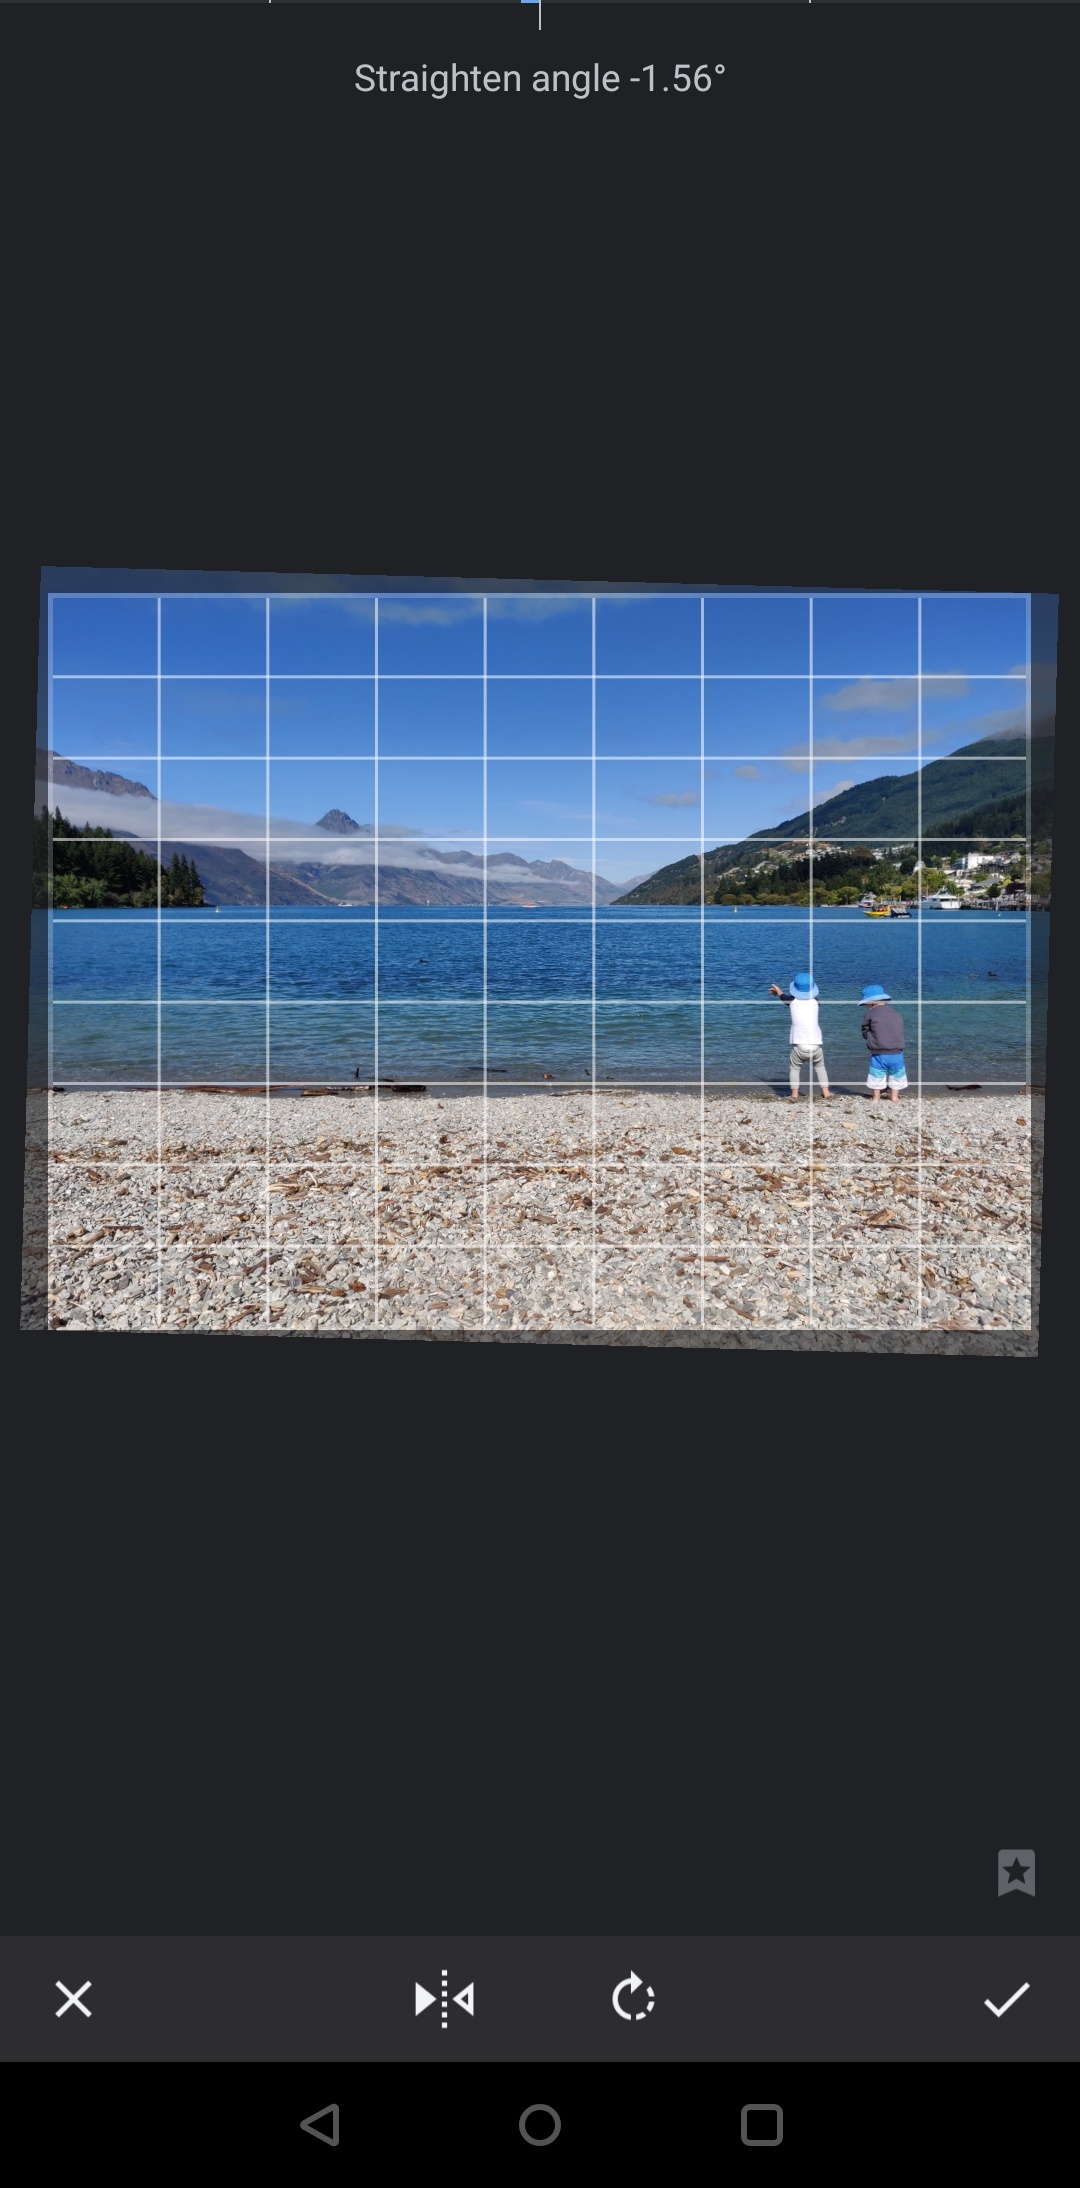
Level your photo using the Crop tool (top right in the TOOLS overview).
At the bottom of your screen, a round arrow with 3 dots appears. Tap it. Then drag your photo left or right to change the angle. The photo will be cropped accordingly.
An annoying or unnecessary part (at any of the sides) of your photo can be cropped out by sliding the outside grid lines towards the middle of the photo. Example: cut the kids out of the photo by dragging the far right side of the grid to the left. This part of the photo will be cropped out.
Note: When a photo is cropped, pixels will be removed. This means your photo’s resolution is lower. That’s why you make sure to keep your camera straight when shooting. You don’t want to loose too many pixels.
Done? Tap the tick icon in the bottom right.
Step 2: Remove unwanted items, smudges or spots
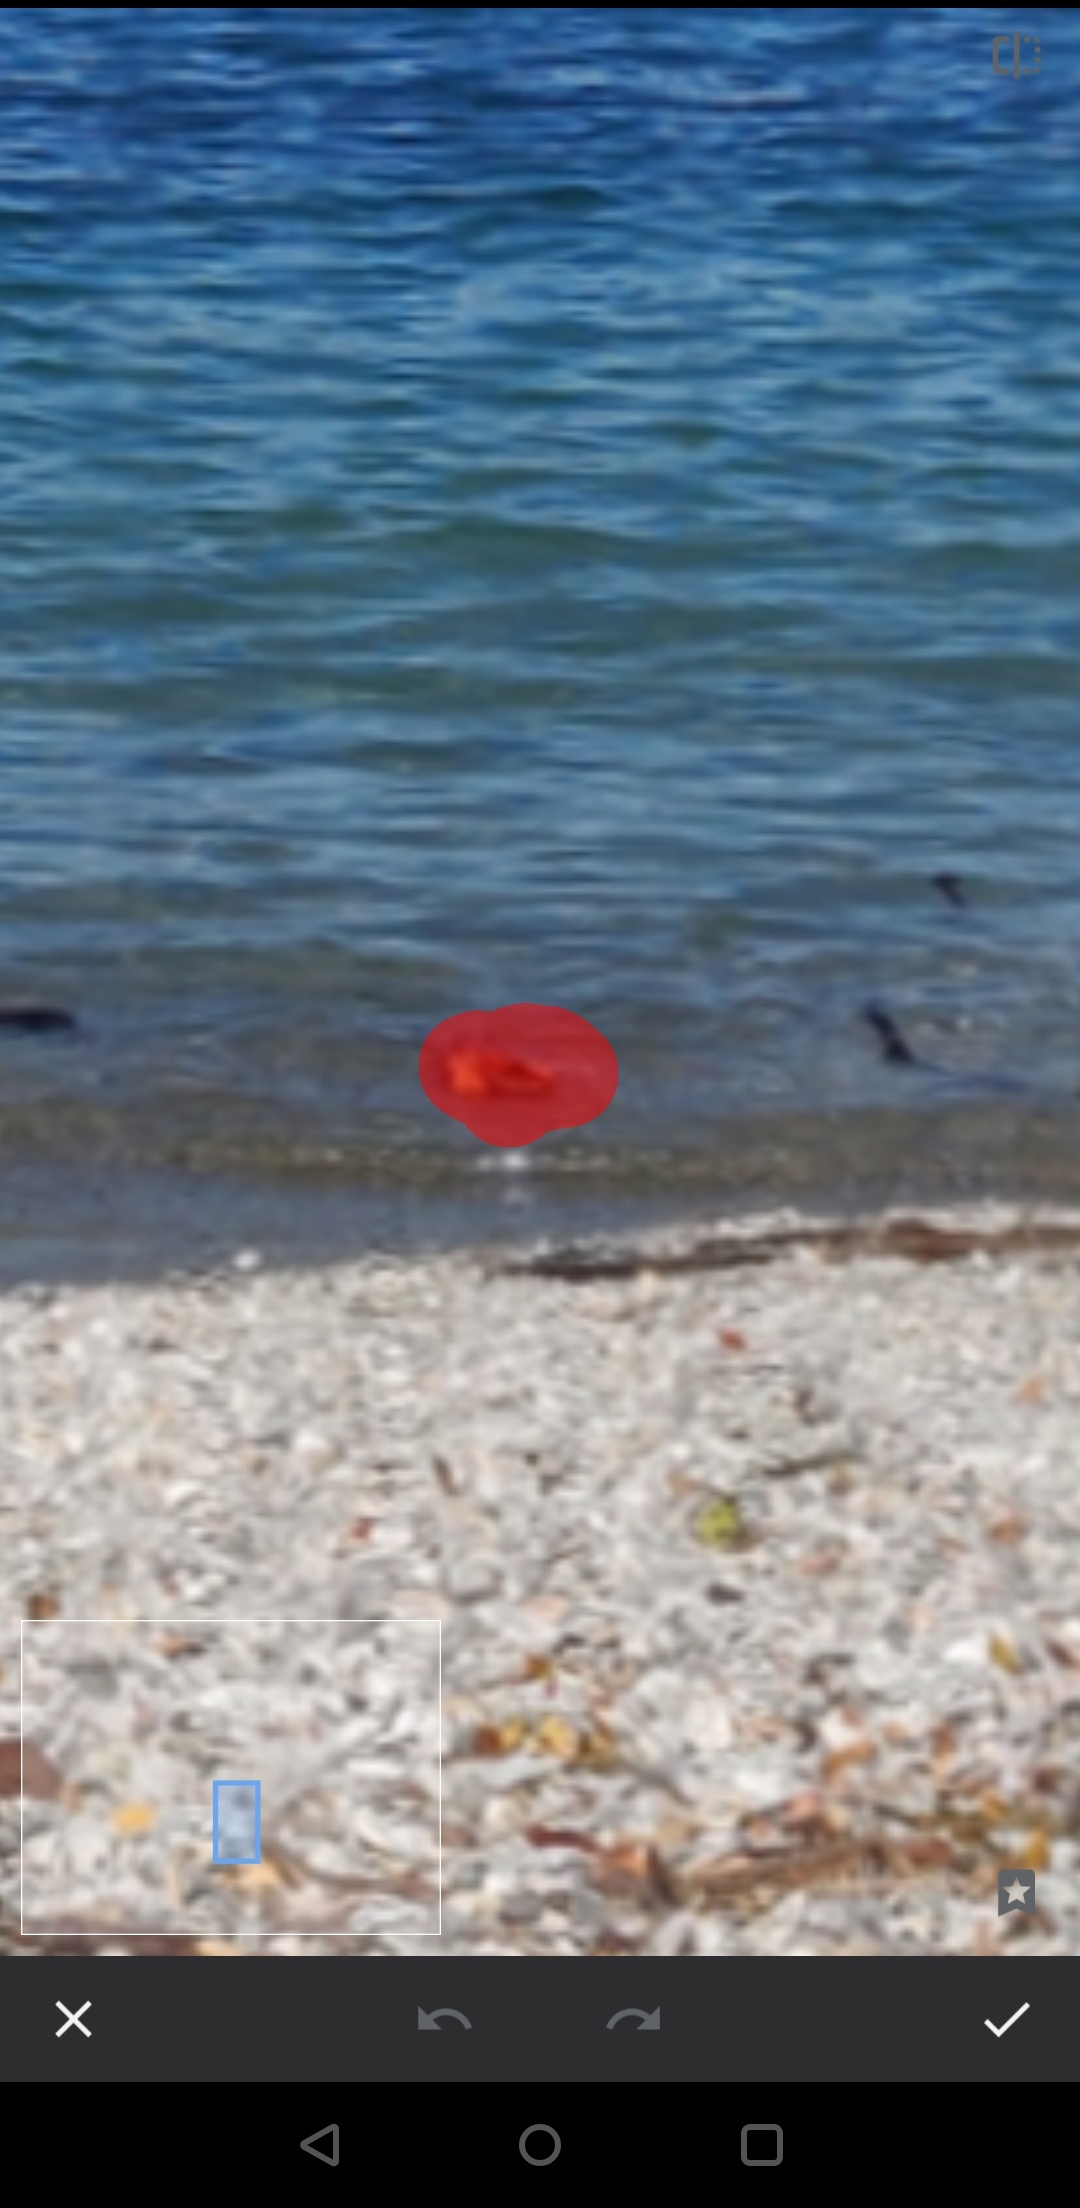
The Healing tool (3rd row, 1st tool in the TOOLS menu) helps you remove small, unwanted things in your photo. Draw a red smudge exactly in the area you want to remove. In the example, I am removing a bird from the lake. Don’t overdo it, make the smudge as small as possible. That way the results will be best. Snapseed fills the area with the necessary pixels to make it seem that the bird was never there. Sometimes this tool works brilliantly, sometimes not. If not, tap the undo button in the bottom of the screen and try again. Depending on the photo, it’s easier or harder to get it right. Luckily, you get as many tries as you like.
Done? Tap the tick icon in the bottom right.

Step 3: Change colors
Many photos could use a little extra color. The tools White Balance and Tonal Contrast are your best friends here. Although the basics are very easily done with the Tune Image tool mentioned in Step 1, if you need a little more control over the colors, use White Balance and Tonal Contrast.
The White Balance tool (row 1, column 4 in the TOOLS menu) lets you change the color temperature, more blue or more yellow. Drag down from anywhere in the screen and also find the option to change the tint. This lets you choose between more green or more pink.
The tool Tonal Contrast (row 3, column 4 in the TOOLS menu) opens with the Brightness option (note the tool title is at the top of the screen). Drag left or right, anywhere in the screen, to change the brightness of your photo. Drag up or down to use the other options within this tool.
Done? Tap the tick icon in the bottom right.

Step 4: sharpening
Sharpen everythingTo sharpen the entire photo, tap Details (2nd icon, top left). The Structure tool opens and you’ll see your photo appear again.
Hold your finger on the photo and drag right or left to see more or less details in the photo. The changes will show right away.
Sharpening locallyIf you want to be more thorough, you can sharpen small parts of the photo, instead of all at once. Use the Selective tool. It’s in the TOOLS menu on the 4th column, 2nd row. Tap Selective and you’ll see your photo again. Tap the area you want to edit.
A white letter B appears in a blue circle. The circle can be moved as you wish. Keep your finger at any place in the photo (except the B) and drag up or down. Choose (B) Brightness, (C) Contrast, (S) Saturation or (S) Structure. The Structure tool gives a part of your photo more structure, which makes it look sharper.
Lift your finger when the tool of your choice is visible.
Drag your finger across the screen horizontally to choose the amount. If you wish to add another local change in the photo, tap the + sign in the bottom of the screen and tap the area in your photo that needs editing.
Done? Tap the tick icon in the bottom right.
Tip: During the editing process, hold your finger on the photo when no tool is selected. You get to see the original after a couple of seconds. This helps you see if you’re on the right track.
When you’re happy with you photo, tap EXPORT at the bottom of the screen. Our tip: choose Export As and choose your desired location.
Edit with Adobe Lightroom (free app) using your smartphone
Download the Lightroom app from the App or Play store on your smartphone. The app is free to use, but there are a few tools that you can only use if you pay. Fortunately, you can come a long way with the free tools. Open the Lightroom app and tap “All Photos” to find your photo. Once found, tap your photo and it will open in Lightroom.
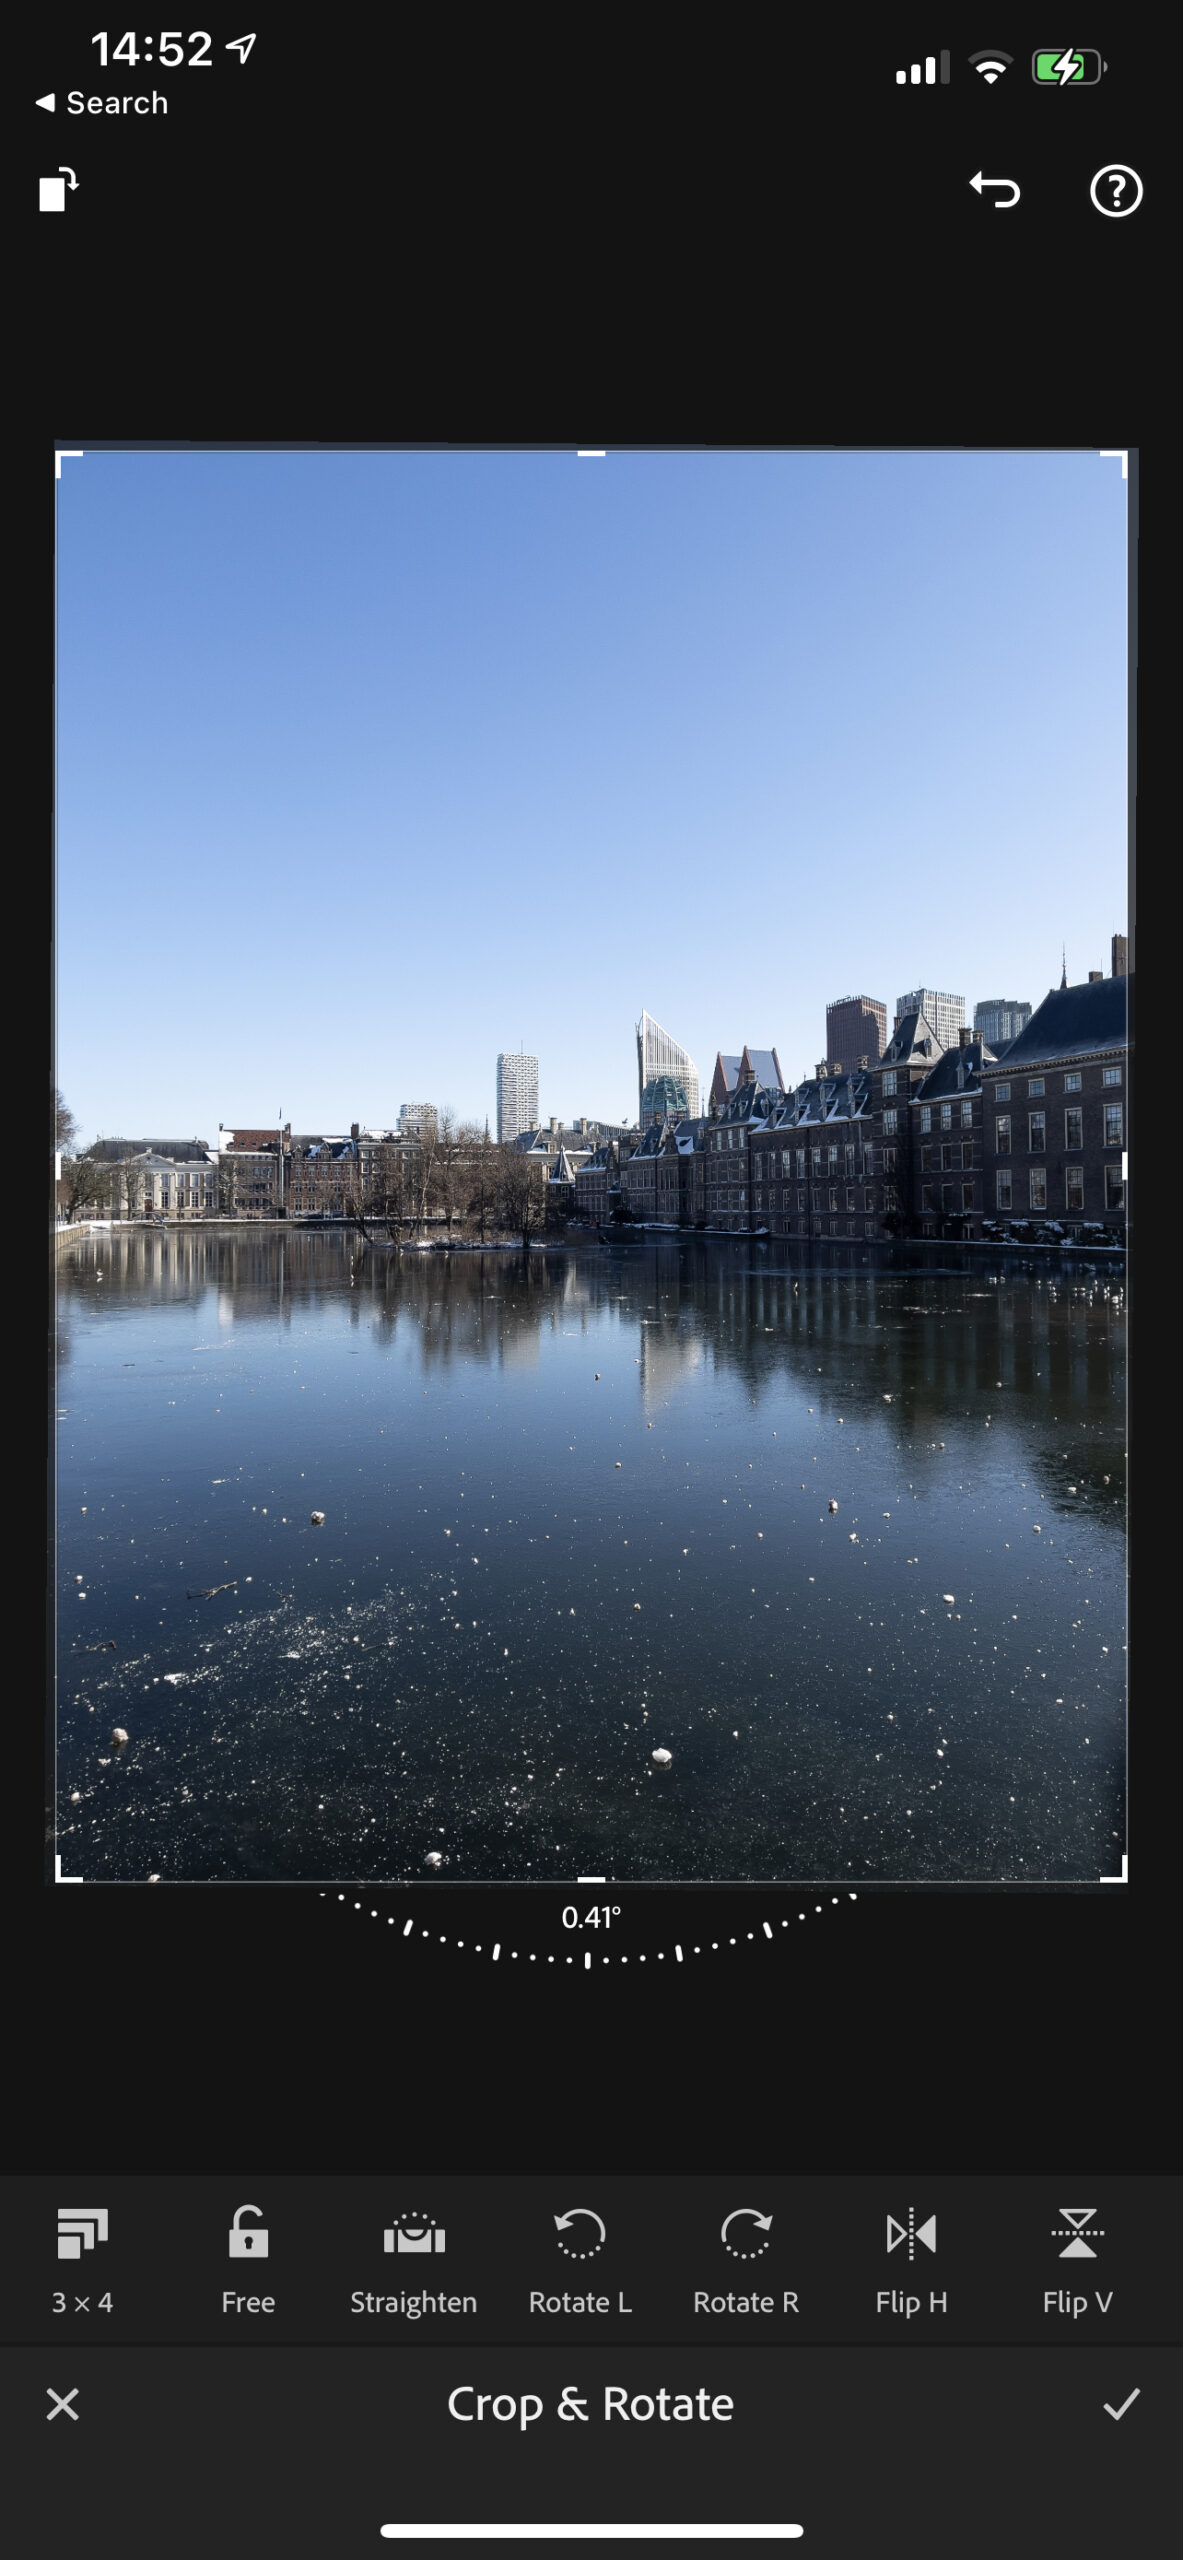
Step 1: Straightening and cropping
A landscape photo is best in 99.99% of the cases when the horizon is straight. You already take this into account when shooting, but it is best to arrange a straight horizon afterwards. Select the Crop tool (Third option from the left in the toolbar).
At the bottom of your screen you will see several options. Tap Straighten, Lightroom will automatically straighten your photo. You can still make adjustments by tapping the dotted line below the photo and dragging to the left or right. The photo is automatically cropped to the set ratio.Do you want to cut a distracting part of your photo, or do you want to change the shape of your photo? Then drag the extreme lines of the grid to resize the photo. Example: Dragging the right outer line to the left cuts off a portion of the right side of the photo. Or select the Ratiotool (first in the crop menu) to change the ratio of your photo.Note: When a photo is cropped, pixels will be removed. This means your photo’s resolution is lower. That’s why you make sure to keep your camera straight when shooting. You don’t want to loose too many pixels.Done? Tap the check mark at the bottom of your screen.
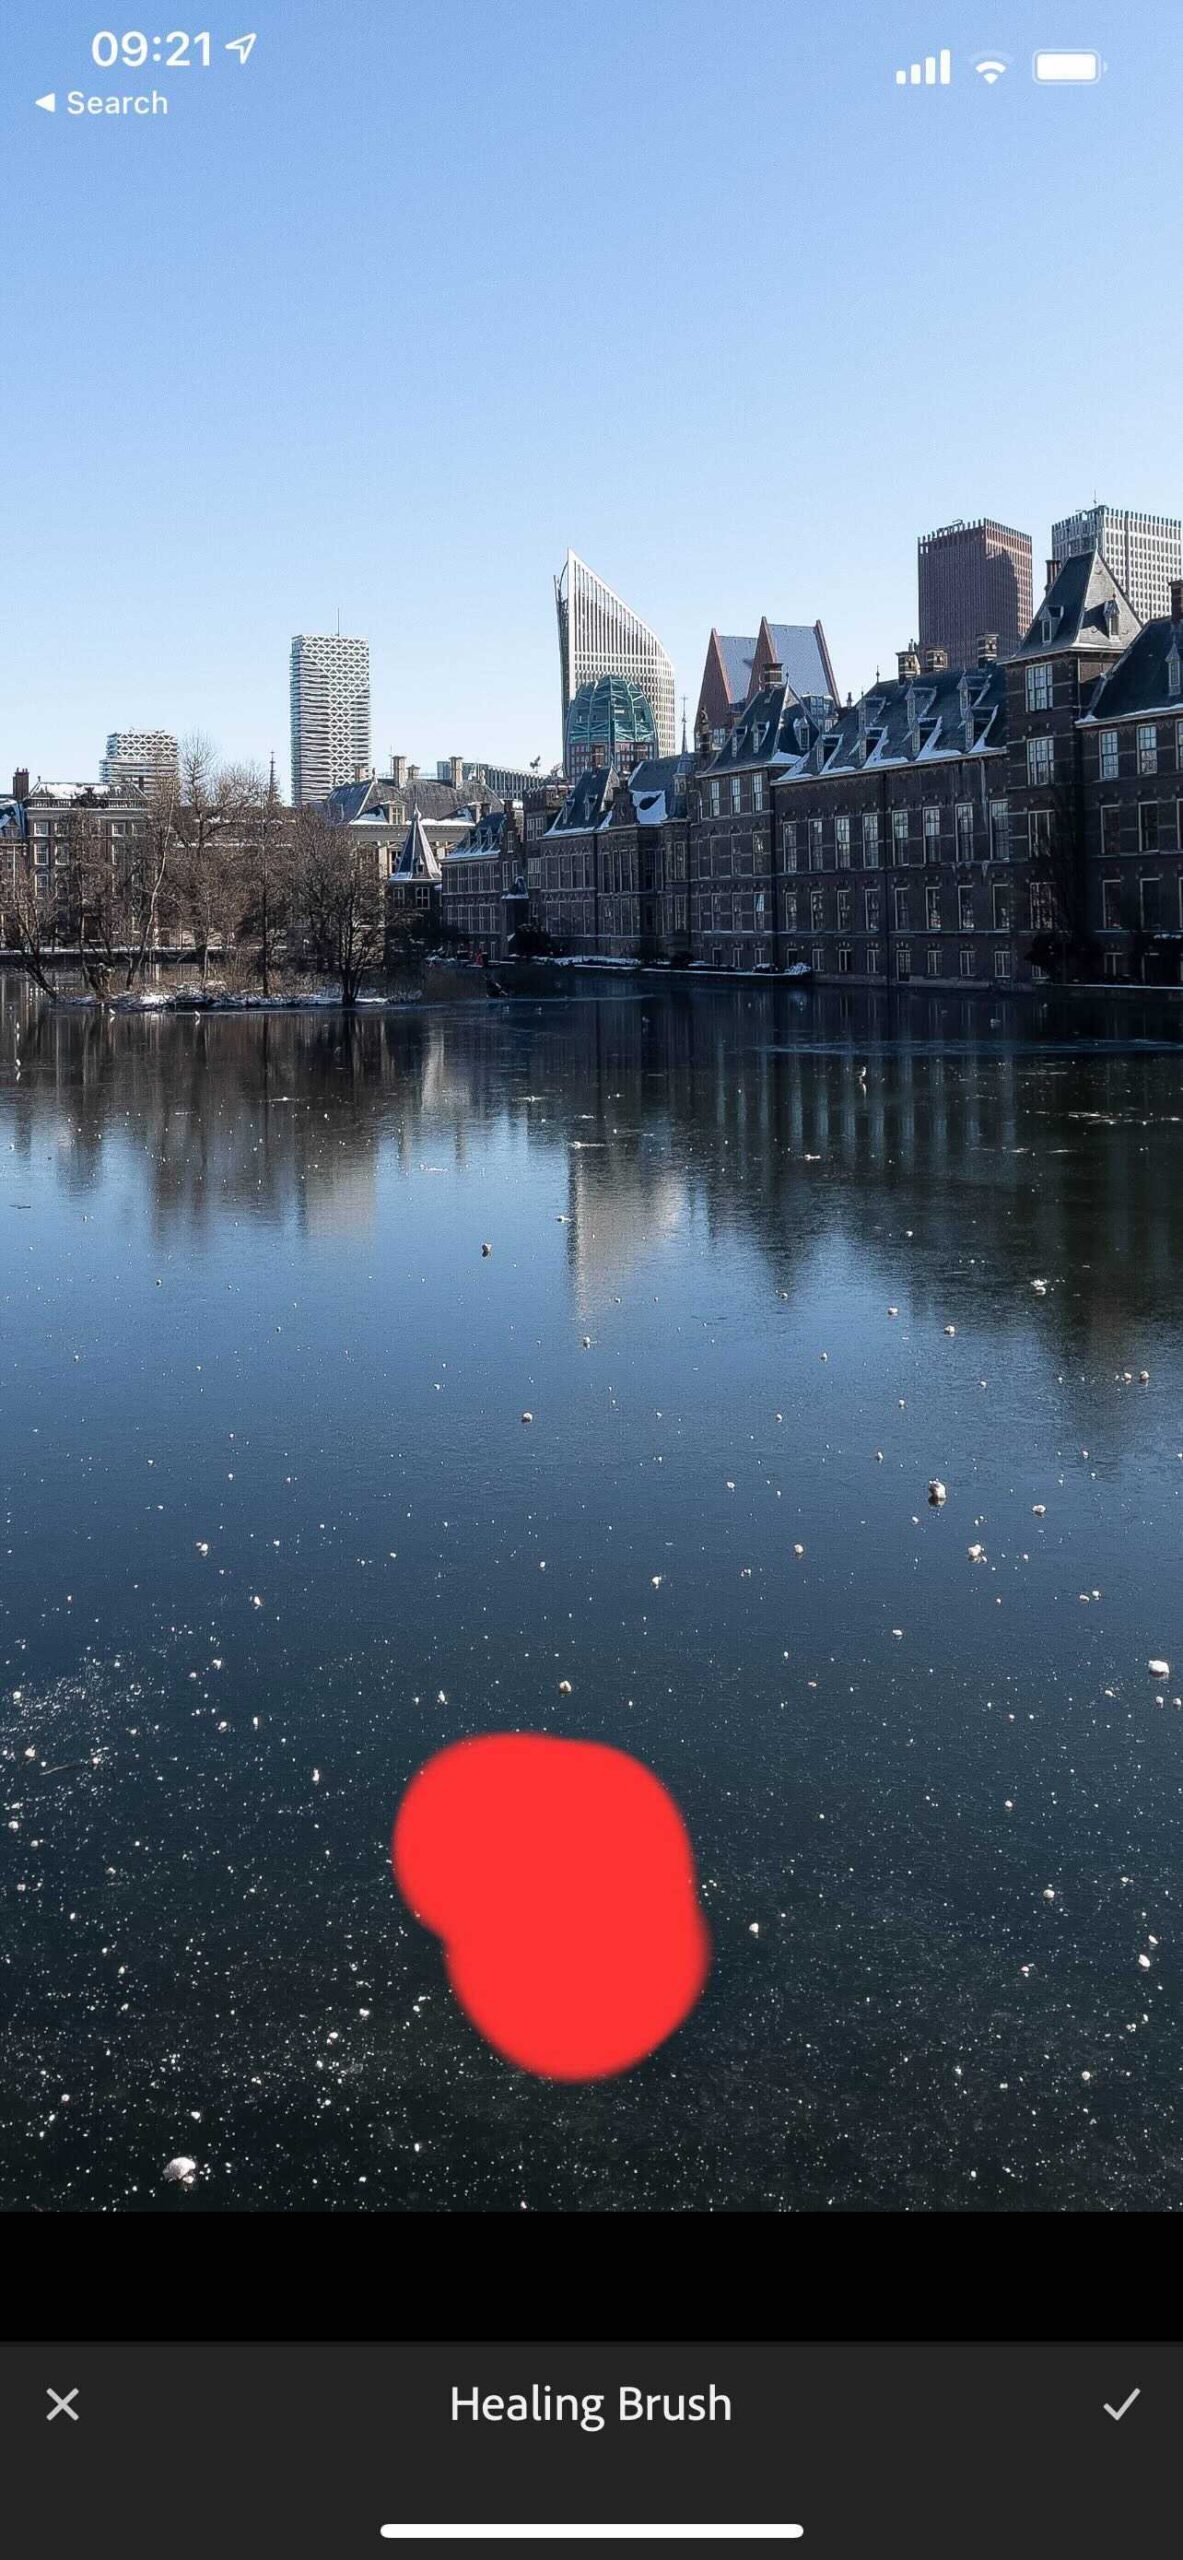
Step 2: Remove unwanted items, smudges or spots
The Healing tool (2nd option from the left in the toolbar) helps you remove small, unwanted things in your photo. Draw a red smudge exactly in the area you want to remove. In the example I remove some snow from the ice. Don’t overdo it, make the smudge as small as possible. That way the results will be best.
Lightroom gives you the option to choose which area to use as the source. Example: In the example photo you want to see a little less snow in the middle. You mark the area you want to adjust by coloring it red. Then you mark an area with less snow. Lightroom already gives a suggestion for this by means of a blue diamond in a suitable location according to Lightroom. The area around the blue diamond is, as it were, ‘cloned’ and ‘pasted’ on the spot of the red marking. Lightroom ensures that there is a smooth, invisible transition between the photo and the renewed area below your red selection.
Done? Tap the tick icon in the bottom right.
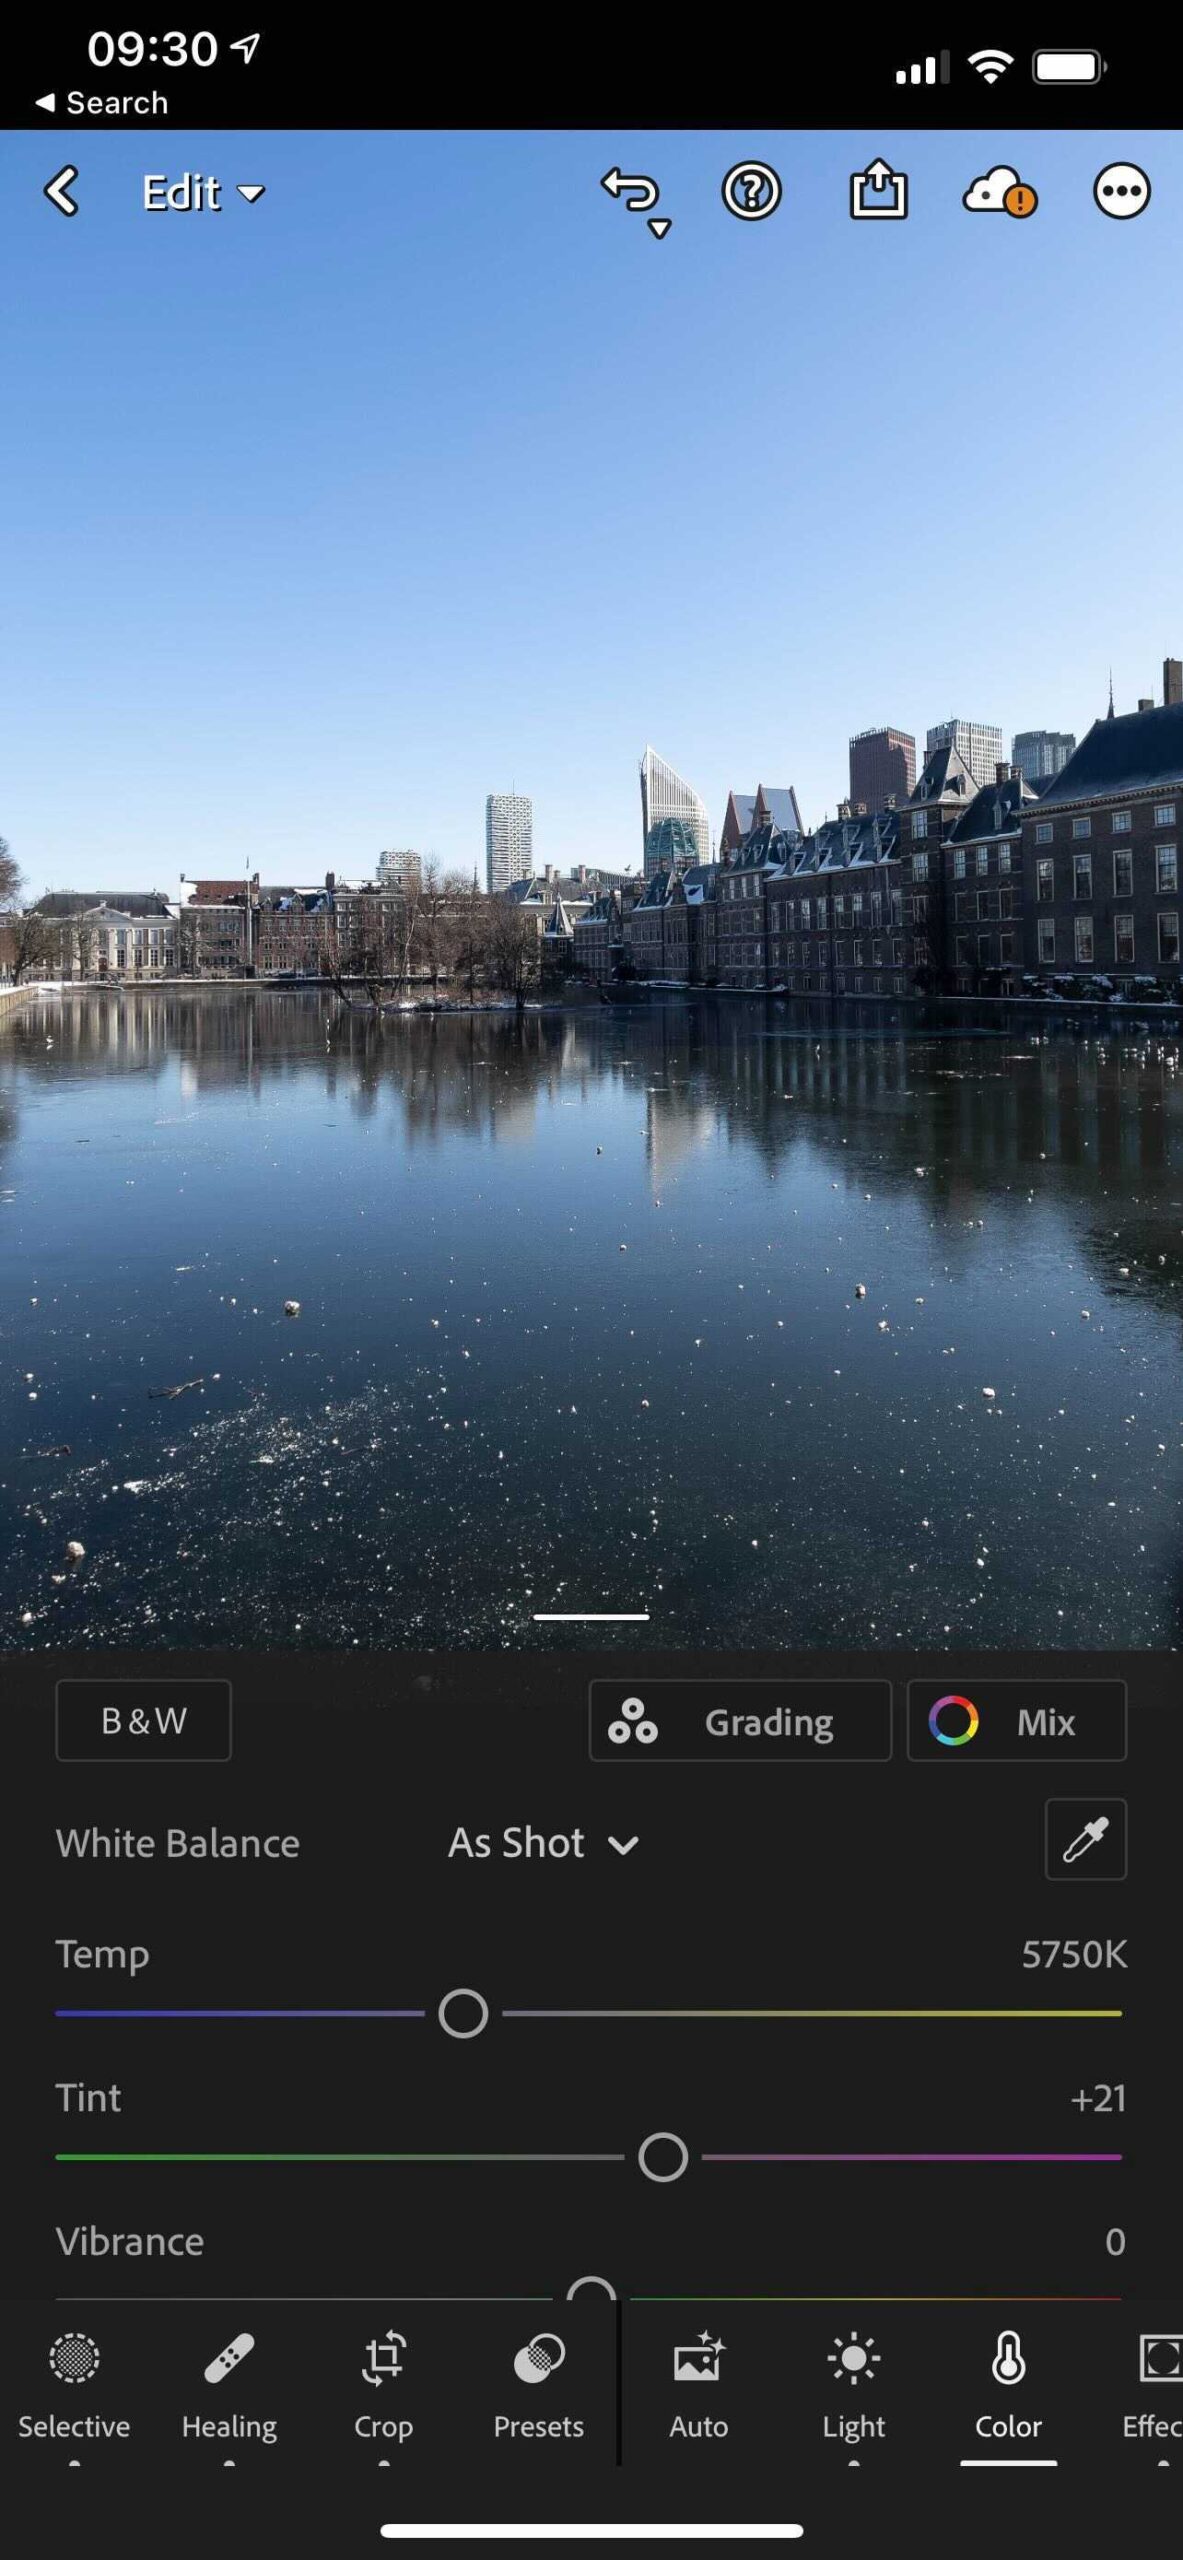
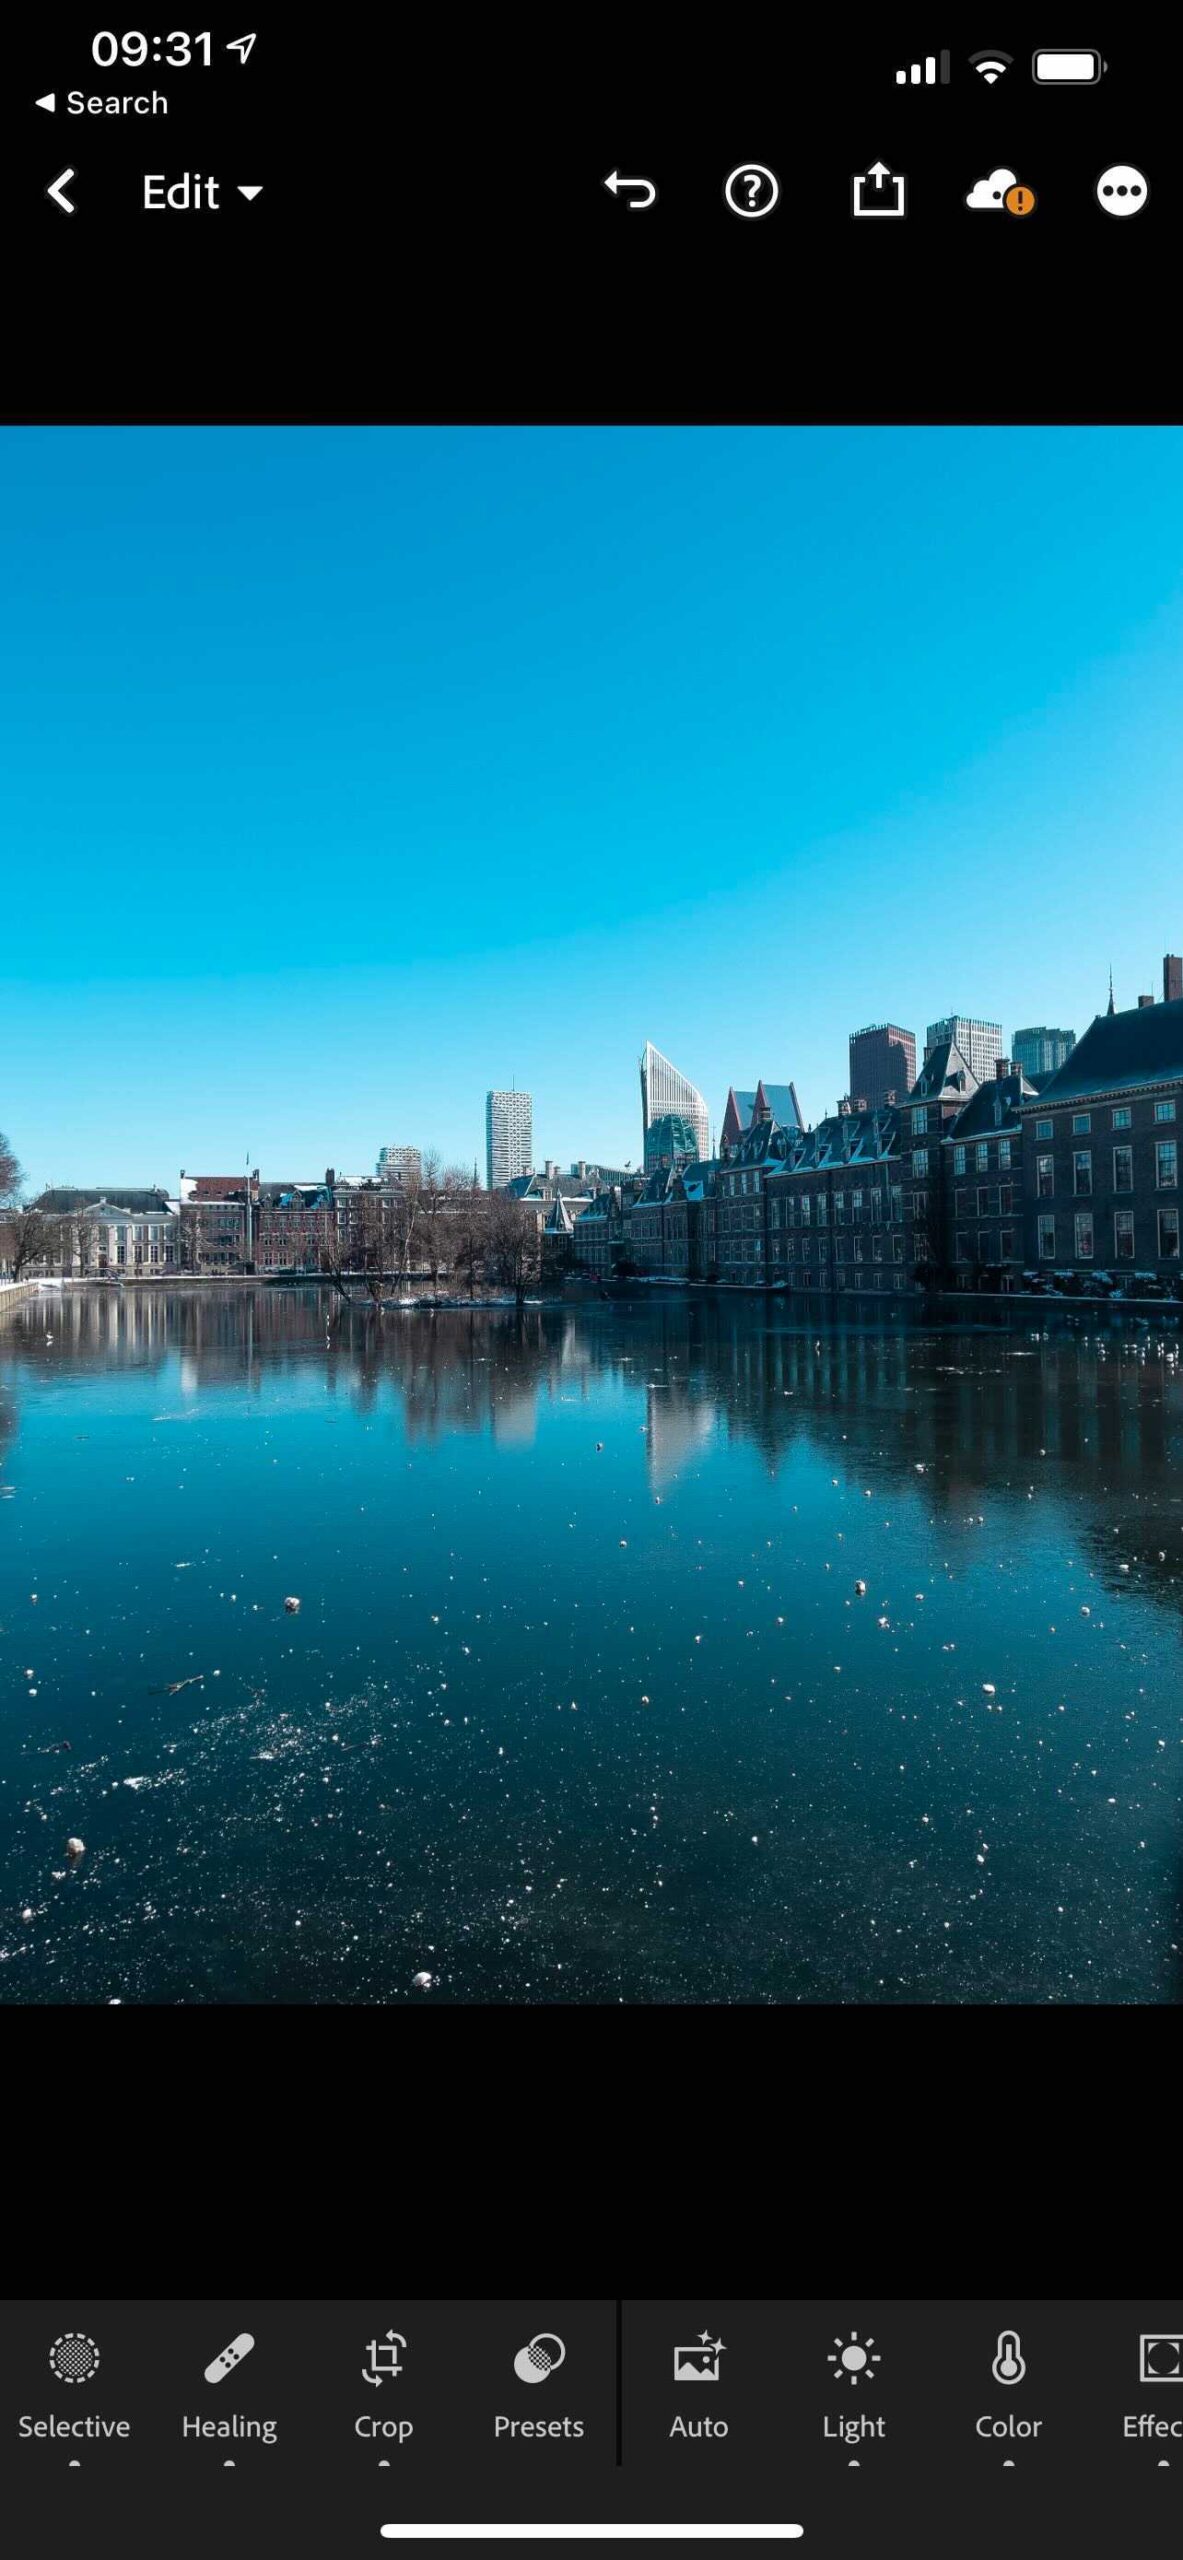
Step 3: Change colors
Sometimes your photo just needs an extra boost to pop off the wall. By using the Color tool (7th from the left in the toolbar) you can adjust the White Balance and Vibrance.Tap on Colors, you will see the different options appear. The White Balance sliders for Temp & Tint and the Vibrance and Saturation slider. Drag left or right to adjust it.You can also use the Grading or Mix Tool with which you can edit specific colors.With the Selective(mask) tool you can edit parts of your photo in different ways and with the Light tool you can adjust the Contrast and Brightness.
Done? Tap the tick icon in the bottom right.

Step 4: sharpening
sharpen everythingSwipe at the bottom of the toolbar to the Detail menu and select it, you will now see several sliders appear.Hold your finger on the dot of the sharpening slider and drag to the right or left to show more or less detail in the photo. You will see the difference immediately.
The Radius sliderMakes the edges/lines thicker, creating more contrast, making the photo appear sharper.The Detail slider This slider sharpens the details in the photo. Be careful with this, the higher the values the more details are sharpened this can cause noise. If you keep the value low, you only sharpen the edges.The MaskingThis slider offers you a little more control and Lightroom determines where the sharpening should be applied. If the slider is set to 0, the entire photo will be sharpened. If you drag the slider to the right, only the areas with a strong border will be sharpened.Local sharpen/editYou can also sharpen a (small) part of the photo. For this you need the Selective (Mask) tool. This tool can be found on the far left of the toolbar. Tap it and you will see your photo reappear. At the top you can choose between a brush or gradient. Select your choice and mark which part of the image you want to edit, the selected part turns red. Choose the tool you want to use and use your slider to adjust the amount. If you want to do another local edit, tap the plus (+) at the top to select another area.Done? Tap the check mark at the bottom of your screen.
Bonustips
There are, of course, even more smartphone apps for photo editing. We recommend Snapseed and Lightroom because we like them ourselves, and they are popular and reliable. What smartphone photo editing tips do you have? Share it with the world by leaving a comment below.
Some tips before ordering:
- Save your photo in high quality. As high as possible, for the best print result.
- Would you rather place the order via the computer? Send the file to yourself, for example via WeTransfer or via Google Drive. Avoid all channels that compress your file, such as WhatsApp or Facebook.
- Your screen shows your photo by means of light. When you print your photo, the photo will often appear darker (due to lack of light behind the photo). That’s why I recommend slightly brightening your photo before ordering. Your print will then be as clear as your photo on your screen. If you want to be sure that your smartphone photo is not too dark or too light, request the Photo Check and our Xperts will advise you for free.
- Try both Snapseed and Lightroom on your smartphone and experience the different options.
Ready to order? If you want extra certainty, our Xperts will be happy to take a look with you.Request the free Photo Checkand you will receive free advice about the suitable formats and possible improvements to your photo. Direct order? Order your photo on Xpozer here >
Read some more:


