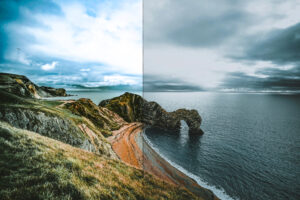
When you want a cool, dark photo with a black background and a low-lit subject, you can get amazing, mysterious-looking photos by editing your photo just right. When your digital photo files have blacks that are truly black, they will also be truly black on your Xpozer Print. Just make sure that the black parts of your photo are actually black, with this editing guide.

Whether you work with Lightroom, Luminar, or any other photo editing software, they are all able to make your blacks truly black. They all work a little differently, and we can’t get you a step-by-step for each one of them. What we can do, is give some general tips that you can use with whichever software or camera you like to work.
Tip 1: Get enough light in your black photo
Don’t shoot in the dark when you want a dark photo. Sounds weird, I know, but bear with me. If you shoot a very dark scene with the lights dimmed too much and you don’t haev the proper camera settings, your camera cannot, I repeat: cannot take a proper photo. You will experience lots of noise (especially in the dark parts of the photo) and your photo will lack color. To avoid all that, make sure there is enough light for your camera to be able to get all possible information in your photo. Use a tripod, set your ISO-value as low as possible, make sure your shutter speed isn’t too fast and worry about making your image darker later, when editing your photo.
If your original photo is too dark, or too bright, for that matter, it will lack the critical information that’s needed to save all necessary info on light and color.
After shooting, edit your photo in Photoshop, Lightroom, Luminar or other photo editing software to get the dark, gloomy pic that you were going for. More on that later.
Tip 2: Use your histogram to check your lighting
The histogram is a very important tool for photographers to keep an eye on the lights and darks in their photos. The histogram is a graph that’s found in your camera and all photo editing software. It looks like this:

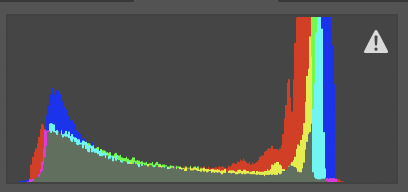
You can also check and adjust your histogram during editing. The graph shows the amount of light in your photo. It looks like a mountainous landscape, ideally with a bell-shaped mountain in the middle.
It works like this: on the horizontal axis, the graph goes from dark (left) to bright (right). The vertical axis shows the amount of darkest and brightest shades.
The amount of darkest shades in your photo show on the left, the amount of brightest shades in your photo show on the right. The midtones are in the middle.
If your histogram has high mountains on the left, your photo has many darks in it. If the mountains are mostly concentrated on the right, your photo has many highlights. So, ideally, a well lit photo has a mountain, concentrated in the middle. But, that doesn’t necessarily mean that any other shape is wrong. The histogram is just a guide to help you prevent over and under exposure.
Tip 3: Use curves to check and adjust black parts in your photo
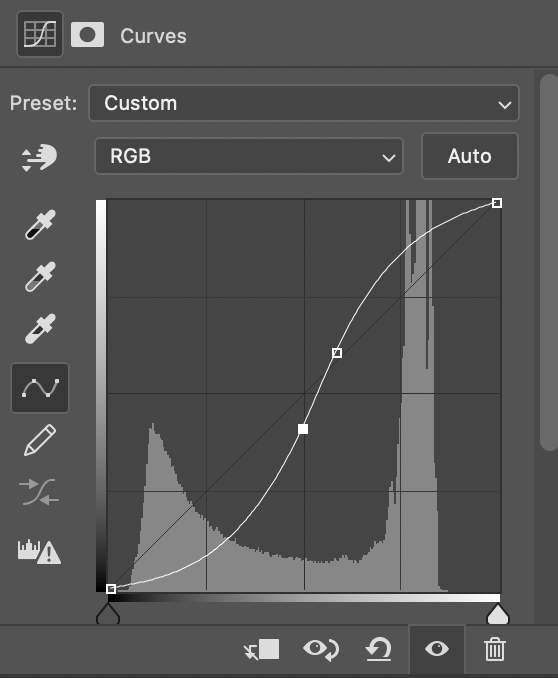
Curves are used to edit your highlights and lowlights. All well-known photo editing software uses curves to help you adjust the light in your photo. The Curves tool is also shown as a graph. Here’s an example from Adobe Photoshop.
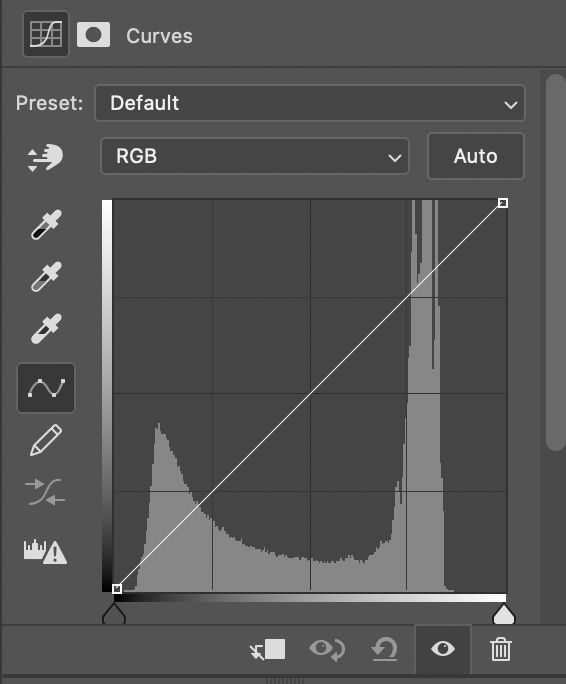
You can see a diagonal line with the histogram in the background. It shows you the amounts highlights and lowlights that are in your photo.
The Curves tool works like this. The graph is made up in the same way the histogram is. Left is darks, right is brights.
Making your bright shades brighter goes like this:
So, if you want to make your brighter shades even brighter, set a point on the right side of the diagonal line, by clicking the line. Not on the far right, at 3 quarters of the line is perfect. Drag this point up to make it brighter, drag it down to make it darker.
Making your dark shades darker goes like this:
If you want to make your darker shades even darker, set a point on the diagonal line on the left side. Not on the far left, at 1 quarter of the line is perfect. Drag the point up to make your darks brighter, drag it down to make your darks darker.
The midtones
If your midtones need to become brighter, set a point in the middle of the diagonal line and drag it up. Drag it down if your midtones need to be darker.
The S-Curve
When you make your darks darker and your brights brighter, you’ll see an s-shaped curve in the graph. See the example below. It’s a classic graph which shows heightened contrast.
Tip 4: Don’t forget to check your black
Check, check, double check the blacks in your photo. If there’s black in your photo, you’ll want that to show on your Xpozer Print as well. So make sure to check your curves graph. Also: never forget to check your computer screen settings. If it’s set too dark, your darks might show darker than they actually are. So check your blacks with the full brightness of your screen.
Inspirational photos for black images:
In short: how to get the black tones in your photo truly black?
If you want your Xpozer Print (or any other print for that matter) to have deep blacks, follow these steps:
- Take your photo with enough light
- Check your histogram while shooting
- Adjust the lights and darks with the Curves-tool
- Check the blacks
- You’re ready to print!
Did you like this article? You might also like these:
How to shoot abstract photos – tips and tricks
How do viewing distance and resolution work together?


